Pages

Diberdayakan oleh Blogger.
Tampilkan postingan dengan label DINNER. Tampilkan semua postingan

Selasa, 15 Juli 2014

Kashmiri naan recipe | Kids recipes

kashmiri-naan-recipe
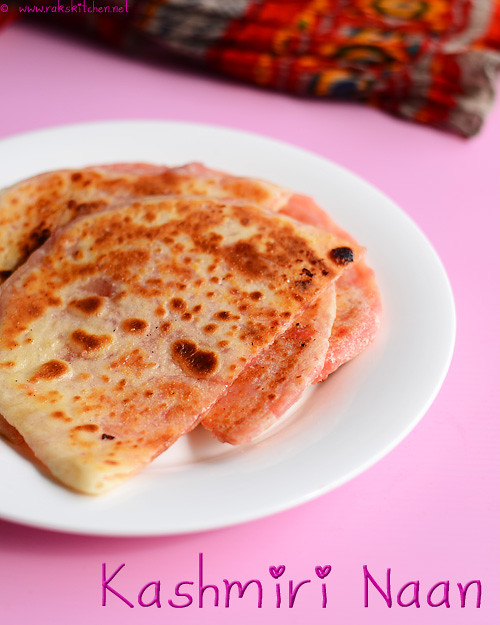
I had kashmiri naan only twice before. That too it came along the naan basket and it ended up in my plate once and only the second time, I somewhat felt like having something sweet and had a wish to eat Kashmiri naan. Honestly I have no idea about Kashmiri cuisine, so I don’t even know if this is really a Kashmiri cuisine or the restaurants developed this recipe and named it so since this is sweet. But this sure is a great tasting naan recipe, kids as well as adults will sure love this. I mostly make no yeast naan, but I tried adding yeast in this recipe. I was not very confident if I could bring the same taste and also worried how it will be rolled out without messing it. But trust RaksAngel, this is so easy and rolling part is not at all tricky. Comes out neatHappy. Stays soft, so pack it for your kid. I made it with maida, if you want you can try with atta too. Not sure about the texture, but I guess it would be nice too.
kashmiri-naan-recipe1

Kashmiri naan recipe

Recipe Cuisine: Indian  |  Recipe Category: Lunch/ Dinner
Prep Time: 2 hrs dough resting time    |  Cook time: 30 mins    |  Makes: 4

Ingredients

For the dough

Maida  1 cup 
Milk  1/4 cup 
Curd/ Plain yogurt  1/4 cup 
Instant yeast  1/2 tsp 
Baking powder  1/4 tsp 
Baking soda  2 pinches 
Sugar  1/2 tsp 
Oil/ melted butter  1 & 1/2 tblsp 
Salt  As needed

For stuffing

Badam 15
Cashew nuts 6
Glazed cherries 10
Sugar 3 tblsp (or as needed)


Method

  1. To make the dough, first place the flour in a mixing bowl. Add yeast, sugar, salt, baking powder, baking soda to it and mix well.Make a dent in the middle. Add curd, milk and oil.
  2. 1-mix
  3. Gather together to make dough and knead well for 5 minutes until smooth. Keep aside for 2 hrs atleast.
  4. 2-knead
  5. Keep covered leaving enough space for the dough to rise and cover the mouth of the bowl with cling wrap or lid. Let it be a warm space. The dough would have risen and doubled in volume.Punch down and knead again to make it smooth.
  6. 3-punch
  7. Soak badam in warm water for an hour and peel off the skin. In a blender, coarsely grind the glazed cherry, sugar, badam and cashews. Set aside in a bowl.
  8. 4-grind
  9. Divide the dough into 4 equal sized balls. In a well dusted counter top, use your hands to spread the dough into a small disk.
  10. 5-flat
  11. Spoon 2 tblsp of the ground sweet mixture. Cover and pinch the ends together as shown in the picture.
  12. 6-stuff
  13. Again dust and roll out into thick, oblong naans. While rolling, if the naan shrinks back, drizzle some oil in the counter top and again roll out.  Flip and roll both sides for even distribution of the mix throughout the dough.
  14. 7-cook
  15. Heat a pan and cook the naan in medium flame. You can cook covered to make it puff up as it makes the naan soft.
  16. 8-cook
  17. Flip and butter if desired and cook until brown spot appears here and there. Cook in low to medium flame for even cooking.
  18. 9-ready

Notes

    • Please adjust the sugar according to suit your taste.
    • Add nuts just as mentioned, too much of badam or cashew will give a raw smell otherwise.
    • You can add red food colour too along with this stuffing to make it more colourful.
    • You can make this without yeast too.
    • Important: I have used Instant yeast here. It is used less in amount than the other yeasts. Also it can be directly added to the flour without dissolving. If using active dry yeast, please dissolve 1 tsp(for this recipe) of the yeast in lukewarm milk along with sugar, wait for 10 minutes to froth and then use this to make dough along with curd and oil, otherwise recipe and everything same. You can ask me if you have doubts regarding yeast.
This naan stays soft even after cooling down. So its perfect for kids lunch box. We eat this as such. I am not sure which side dish will be apt for this.
You may also like : Naan without yeast  |  Nutella chapathi    |    Butter Kulcha

Kashmiri-naan

Selasa, 01 Juli 2014

Schezwan noodles | Shezwan noodles recipe

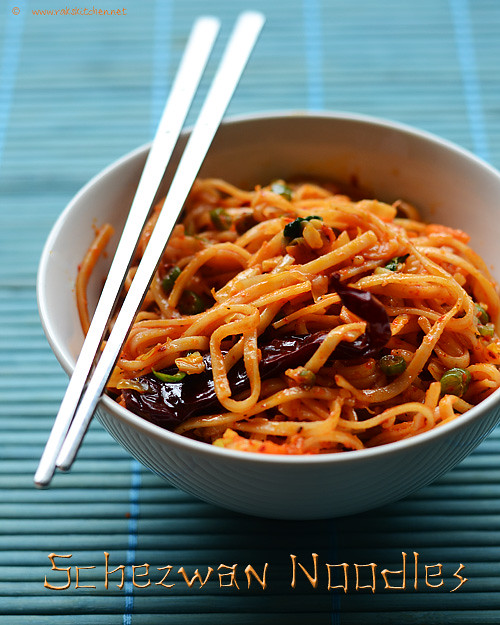
schezwan-noodlesI now a days prefer schezwan recipes when it comes to Chinese cuisine. Fried rice and hakka noodles became very usual and all I need is some spicy stuff, so I prefer schezwan fried rice or noodles these days. Love the spiciness, garlic flavor and the fiery red hot colour too. I made some schezwan fried rice, had the chilli paste, so wanted to try noodles as well. I loved the noodles more than the rice. I assure about the taste, though the method may not be the same as it is supposed to be made.  
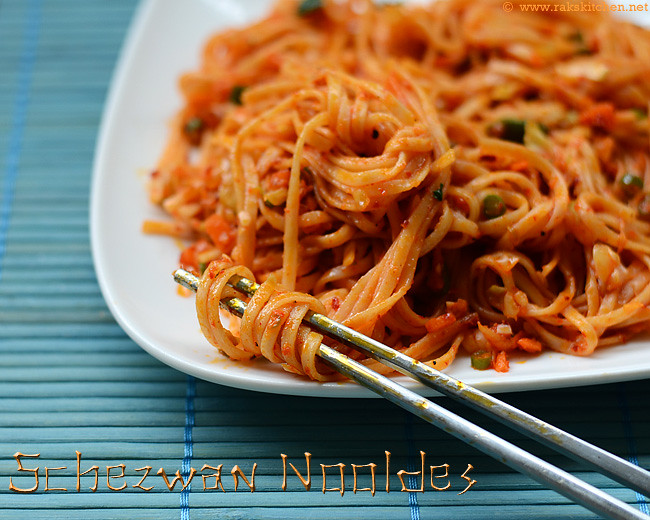
schezwan-noodles-spicy

Schezwan noodles recipe

Recipe Cuisine: Oriental  |  Recipe Category: Dinner
Prep Time: 15 mins    |  Cook time: 15 mins    |  Serves: 2

Ingredients


Plain noodles  A small bunch* 
Soya sauce  1 tsp 
Chilli sauce  1 tsp 
Black pepper powder  1/2 tsp 
Cabbage, finely chopped  1/2 cup 
Carrot  1 small, finely chopped/ julienne 
Baby beans/ beans  10, finely chopped 
Garlic, finely chopped  3 tblsp 
Dry red chilli**  1 + 8 
Spring onion (optional)  To garnish 
Sugar  3/4 tsp 
Olive oil/ sesame oil  4 tblsp 
Salt & water  As needed 

*Say roughly 1 inch diameter.
**Kashmiri red chillies - they are long and red, skin looks shrunken

Method

  1. Boil enough water and cook the noodles as per the package instructions. It hardly takes 4-5 minutes after you add the noodles to the boiling water. Drain and wash immediately to prevent sticking to each other.
  2. 1-cook
  3. Soak red chillies in hot water for 30 minutes or boil water and add the chillies, cook for 5 minutes. Cool down and grind to a paste. Make sure to grind properly.
  4. Finely chop all the required garlic, vegetables and keep all the other ingredients ready.Heat a kadai with enough oil, add a red chilli followed by the chopped garlic. Fry just for a minute,taking care, not to change its colour.Do not over fry. Add the chilli paste.
  5. 2-fry
  6. Give it a fry for minute over medium flame until the oil separates. Add chopped carrot and beans first, fry for 30 seconds in high flame, then lastly cabbage.
  7. 3-cook
  8. Stir fry for a minute over high flame. Add sugar, salt, chilli sauce, soya sauce, pepper powder.Stir quickly and add the cooked noodles.
  9. 4-add-noodles
  10. Mix or toss well so that everything gets mixed up evenly. Adjust salt, pepper and add oil if needed. I added chopped celery leaves towards the end. Transfer to the serving bowl.
  11. 5-ready

Notes

  • If noodles get stuck to each other before you add along with veggies, just sprinkle some water to loosen it. 
  • You can add spring onion in this recipe, finely chopped – white part after garlic, green part finally for garnish. 
  • You can add sugar as soon as you add veggies to retain its colour, taste and crunchiness. 
  • You can grind the chilli paste ahead and store in refrigerator and use it as needed (just for the sake you cannot grind too little chilli to make smooth paste). 
  •  Do not over fry garlic as it will not lend the flavor we need for this recipe. 
  • Adding lots of garlic is must for this recipe. Otherwise no flavor. 
  • Sesame oil and olive oil works best for this.

Serve hot as such or any manchurian side dish like Gobi manchurian, baby corn manchurian or veg manchurian gravy. You can also try chilli paneer dry or chilli paneer gravy as side dish.
schezwan-noodles-recipe

Rabu, 12 Maret 2014

Broccoli paratha recipe | Indian broccoli recipes

broccoli-paratha       
I am not a big fan of broccoli, mainly its texture, so I always find a way to cook it in a way that its in mashed form like in my broccoli pesto pasta recipe. Aj is just opposite to me, he loves broccoli only if its in bite florets. This recipe is told to me by my friend Sangeeta and she asked me to try it. I loved the way it is prepared – with spice powders both in the stuffing and in the dough. I tried and I liked it a lot. This is sure a great recipe with broccoli for me to consume this healthy veggie. The preparation is exactly same as gobi paratha. I would say, I like this more than gobi parathaCool. Makes it a perfect one for your lunch box or your kid’s lunch box or for a quick fix dinner.

paratha-recipes

Broccoli Paratha recipe

Recipe Cuisine: Indian  |  Recipe Category: Lunch/ Dinner
Prep Time: 15 mins    |  Cook time: 15 mins    |  Serves: 2

Ingredients

Atta/ wheat flour - 1 cup

Red chilli powder - 1 tsp

Oil - 1 tblsp + as needed

Salt - As needed


Stuffing

Broccoli, grated - 1 & 1/2 cup

Onion - 1

Finely chopped ginger - 2 tsp

Red chilli powder - 3/4 tsp

Garam masala powder - 1/2 tsp

Turmeric powder - A pinch

Salt - As needed

Oil - 2 tsp

Jeera - 1 tsp

Method

  1. Prepare dough with approx. 1/2 cup water (plus or minus as needed) using the first table ingredients. Keep aside while you prepare stuffing and make equal sized balls out of it at the time of rolling.
  2. 1-dough
  3. Wash and tap the excess water from broccoli. You can either grate or run it in a food processor. I used my mixie. Heat kadai and temper with jeera.
  4. 2-grate
  5. Add ginger and onion, fry till onion turns transparent. Add grated broccoli and mix for aminute.
  6. 3-fry
  7. Add turmeric, salt, red chilli and garam masala powder. Mix and cook covered for 2 minutes in medium flame.
  8. 4-cook
  9. Once done, transfer to a bowl. Spread the dough ball into thick circle as shown in the picture and stuff with 3 tblsp of the prepared broccoli.
  10. 5-stuffing
  11. Pinch the dough towards centre to close and make a pocket. Dust generously and start rolling our into thick parathas. Reverse the paratha while rolling in between and dust with flour if needed.
  12. 6-stuff
  13. Heat tawa until hot and cook the rolled out paratha both sides in medium flame. I usually drizzile oil only after the parathas are half done.  
  14. 8-tawa

Notes

    • I used juice/pulse option to give a grated feel for broccoli.
    • The dough should be in right soft consistency. Not sticky, not too stiff too. Otherwise the stuffing will ooze out.
    • I always keep the parathas in wire rack while cooling.

Serve with pickle and curd or any raita. I loved to have it as such. Soft parathas, stays soft for hours!

broccoli-paratha-recipe

Senin, 16 Desember 2013

MISSI ROTI RECIPE | EASY INDIAN DINNER RECIPES

missi-roti-besan-roti  
I had missi roti for the first time in the restaurant Mirchi at Esplanade, here in Singapore. Its one of my favorite restaurants and when ever we go to Raffles side, I will try to have dinner in this restaurant. Have been there for some 4-5 times so far with friends and families. And being a great fan of north Indian food, I would everytime wish to taste different menu that I have never heard or tasted. But only if someone shares with me, I will be comfortable in trying new things. Otherwise I cant finish the dish. That day when I tried it also I alone ordered for a missi roti. But it was too big that I could not finish it. But it was tasting great. I could really guess the ingredients….But wait, the key ingredients were mentioned in the menu card itself! So I could actually, relate the ingredients while eating. After so long, I was really craving for this missi roti, But Vj being busy, I cant ask him to take me to Mirchi restaurant, so I thought of referring here and try it out at home. And I did and enjoyed fully my self for lunch and dinner too. It is perfect dinner recipe and easy too.

missi-roti

Missi Roti recipe

Recipe Cuisine: Indian  |  Recipe Category: Dinner
Prep Time: 15 mins    |  Cook time: 15 mins    |  Makes: 5

Ingredients


Gram flour/ Besan/ Kadalai mavu  1 cup, leveled 
Wheat flour  1/2 cup, heaped 
Ginger, chopped  2 tsp 
Green chilli  1 
Pepper powder  1/2 tsp 
Onion  1 chopped 
Jeera  1 tsp 
Turmeric  1/8 tsp 
Amchoor powder  1 tsp 
Asafoetida  2 pinches 
Coriander leaves, chopped  1 tblsp 
Oil  2 tblsp 
Salt  As needed 


Method

  1. Sieve the flour to get rid of small lumps. Mix all the ingredients. Add water and make a stiff dough. Keep covered for 15 minutes. 
  2. 1-sieve
  3. Knead again to make the dough smooth and divide into 5 equal sized balls.
  4. 2-knead
  5. Roll out into slightly thicker than usual roti with generous maida flour. Cook over hot tawa with oil or ghee smeared on both sides, until golden brown spots appear. You can use the spatula to gently press the roti while cooking for even cooking.
  6. 3-cook

Notes

    • The original recipe used anardhana seeds powder. I used amchoor powder as I had no stock of anardhana.
    • I used ginger and asafoetida as I felt I tasted those in the one I had in the restaurants.

Comes out soft and crispy too, stays soft even after sometime. Goeas well with any raita and pickle.

missi-roti-recipe

Rabu, 13 November 2013

NUTELLA CHAPATI | INDIAN NUTELLA RECIPES | KIDS RECIPES

nutella-chapati-1  
I am sure most of you and mainly your kids will be nutella fans. I wanted to post some kids recipes using nutella that too something that is easily adapted to our usual Indian cooking. This is a simple and easy Indian nutella recipe that you can make for your kids lunch box or as a snack/ dinner. Kids would love this, even you may like itSmug. And I am so sorry for tempting you all who ever are determined not to touch nutella here after. I am also one who take it as oath that from tomorrow I wont touch nutella and then breaking it everydayBlushing. There is no such recipe to share, just I am sharing an idea, hope it will be useful. And thanks to friend Sangeeta for the idea of folding, I made use of it here in this recipe. Is your kid allergic to coco? Dont worry, you can stuff sugar and ghee paste inside instead nutella. That’s what she originally shared, but I tried with nutella.
nutella-stuffed-chapati

Nutella chapati recipe

Recipe Cuisine: Indian  |  Recipe Category: Breakfast
Prep Time: 20 mins    |  Cook time: 15 mins    |  Makes: 8

Ingredients


Wheat flour / atta  1 cup 
Nutella  1 tblsp per chapati 
Water  As needed 
Salt  As needed 
Oil/ Ghee  As needed 

Method

  1. Mix flour with salt and add water and prepare dough. Usually its little less than half cup for 1 cup flour. Prepare dough and let it rest for 15 mins. After 15 mins, knead again to make it smooth and divide into 6 or 8 equal sized balls depending how big you want it.
  2. Roll it as you do for chapati, but make sure not too thin. You can roll slightly thicker.1-nutella-chapathi
  3. Spread the nutella in half the chapati and fold it leaving a little space as shown in the picture. Press it with your fingers to seal it.2-nutella
  4. Now fold it decoratively with the left extra space. By practise this will come our pretty well. I will try to upload video to show how to fold it later.3-nutella
  5. Heat tawa and toast both sides with few drops of oil or ghee as required. Press gently in the folded area to ensure even cooking.4-nutella 

Notes

    • Make sure you fold the edges small, otherwise it wont get cooked.
    • CAUTION: The inside stuff will be hot as soon as you take it out from tawa. So be careful.
    • Use your imagination for stuffing, you can add a tsp of finely chopped banana or thinly sliced banana 2 or 3 pieces. You can try the same with strawberry too. Goes well with nutella.
    • You can also try coconut, sugar and dry fruits and nuts inside in this same way.

I am sure your kids  will be excited to have this, so try it for their lunch box or snack box or as evening snack when they are back from school. I am sure you too will be equally loving this one. Bachelors who do not want to disturb their moms also can try this on their own.

indian-nutella-recipes

Kamis, 19 September 2013

SPICY VEGGIE PIZZA RECIPE | HOMEMADE PIZZA WITH ZUCCHINI TOPPINGS

spicy-homemade-pizza

I make pizza very often at home, atleast once in a month!  Aj just loves it. Vj is not a big fan. I too love pizzas, be it ordered or homemade. If its left over, I will also eat (and feel guilty laterDoh). If any kids come home, I just make this and they too love it. This pizza dough recipe is such a keeper. I have been using this same until now. Same as in my first  homemade pizza and in the paneer tikka pizza . It comes out perfect and the measurements are so precise. Soft and stays soft even after cooling down and above all homemade!

pizza-with-zucchini-topping

This spicy pizza is an inspiration from pizza hut’s Spicy veggie pizza. Vj likes Dominos pizza, but Aj loves only pizza hut pizzas. So Vj’s choice will be this spicy veggie pizza. Though its different from the one I tried, the concept of using chilli and zucchini, I grabbed from that. They use a spicy sauce with thai red chilli padi. But I used as topping and used cayenne pepper. Its not too spicy,  but its mildly spicy. And I have tasted zucchini in my life first time only in the spicy veggie pizzas and loved it. So I thought of trying at home. Zucchini and cheese are made for each other and goes well with pizzas. Now a days I am sure in India also we get these zucchini. Sometimes we get colourful zucchini here – green, red and yellow. I used green. So when you are making for kids, you can use the colourful zucchini together in pizzas to make it appealing.

spicy-pizza-with-zucchini

Spicy veggie Pizza recipe

Recipe Cuisine: Indian  |  Recipe Category: Snack
Prep Time: 1 Hr dough resting time    |  Cook time: 20 mins    |  Makes: 1 large pizza

Ingredients


All purpose flour/ Maida - 1 & 1/2 cup

Instant Yeast * - 1 tsp

Milk - 1/4 cup

Water - 1/4 cup (approx.)

Olive oil - 1/8 cup

Salt - 3/4 tsp

Sugar - 1 & 1/2 tsp


*You can replace with active dry yeast – 1 tblsp

For topping

Pizza cheese/ Mozzarella, grated - 3/4 cup

Onion, tomato, capsicum and zucchini - As needed, chopped

Red ripe chilli (Cayenne pepper) - 1

Pasta sauce - 2 tblsp


Method

  1. In a bowl, mix flour, salt and yeast. Mix milk and water and heat it just luke warm. Dissolve sugar in it. Now add this milk and olive oil to the flour and mix.1-pizza
  2. Make a smooth dough. Knead for 5 minutes. Keep aside covered with a cling wrap. Preferably in a warm place. I keep inside the oven with oven light ON. After an hour or 1 & 1/2 hour, the dough would have doubled and risen.2-homemade-pizza
  3. Preheat the oven to 200 deg.C . Get the toppings ready. Knead again the dough smoothly and in a well floured surface, roll out into thick pizza (dust the surface generously if sticky). Just make the sides like a rim. Transfer this to a well greased and sprinkled with some flour pizza pan.3-pizza-recipe
  4. Spread pasta sauce inside the rim and spread some half of the grated cheese, I used mixed cheese.4-homemade-pizza
  5. Arrange the toppings as desired in pattern or just toss the toppings here and there and cover with the remaining grated cheese.5-pizza-recipe
  6. Bake for 14 - 15 minutes in a preheated oven until the cheese melts and pizza turns golden in colour. The pizza should move freely in the pan, with which you can check if its cooked perfectly.6-pizza

Notes

    • I used instant yeast – which has to be mixed with the flour and kneaded.. But if you are using other yeasts, you have to dissolve the yeast in luke warm milk in step 1. Keep the yeast solution for 5 minutes so that it will become frothy. This ensures the yeast is active. If it has not become frothy even after 10 mins, then you yeast is not good enough to bake. So  do not proceed making pizza, otherwise you may end up in hard pizzas or smelly pizzas.
    • Do not skip sugar.
    • You can use 50 50 wheat flour and all purpose flour too.
    • Water quantity is approximate and just use it as only a guidance and adjust accordingly.
    • The dough should be soft and pliable and not stiff to get a soft pizza.
    • Feel free to use your own toppings.
    • More cheese = more tasty, but do not overload, otherwise, centre of the pizza will be looking white and gooey.
    • Do not roll too thick, remember, the dough will rise a bit while baking too.

Here we go with homemade soft and delicious pizza that will melt in your mouth and kids would love each and every bite of it.
homemade-pizza-with-zucchin


Blogger news

Blogroll

About