Pages

Diberdayakan oleh Blogger.
Tampilkan postingan dengan label KIDS CORNER. Tampilkan semua postingan

Senin, 20 April 2015

Homemade ice gola | How to make ice gola

rose-ice-gola
When I was thinking what to post for summer in my blog, some how ice gola came to mind. I have seen ice golas only in ads. But when ever I see, it is toooooo tempting. I have no experience eating ice golas too. I think more prominent in North part of India or may be I have no exposure to this if its available in south India. But when I tried for the first time at home seeing a youtube video, it was too different from the way I thought and it was really a treat for this summer. Even Aj took a sip from the gola and he loved it.
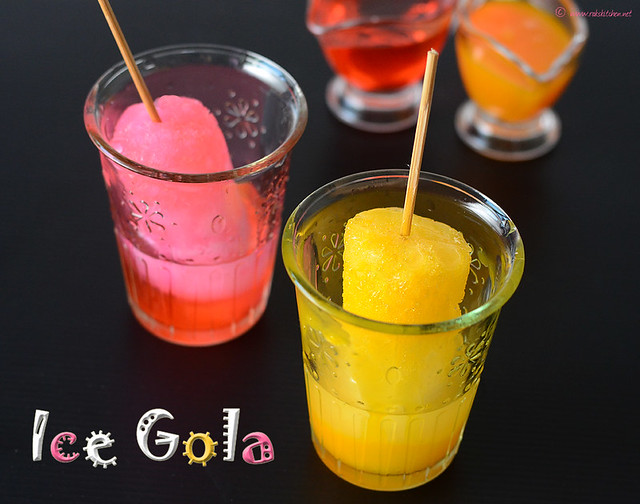
ice-golas
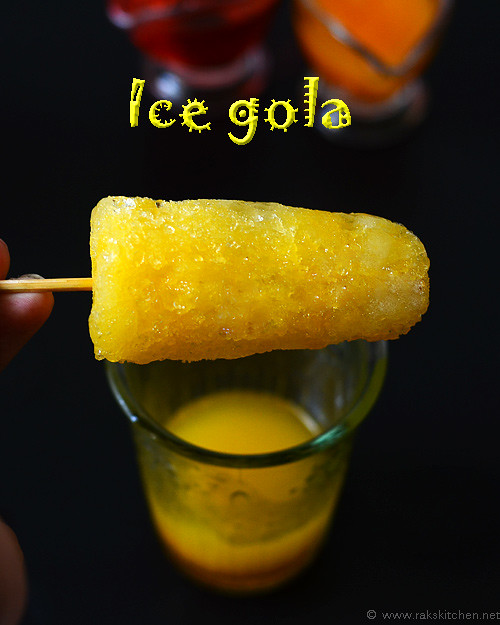
When I tried I thought this is the desi version of granita Winking. Granitas are made with pure fruit juices while these are made with colours and flavors still its our desi style summer treat, we will sure lean towards it. No need to worry about the gola syrup, you need not know gola syrup recipe but you can make this simply with the items we have at home or easily available at market. Like I did. Rose syrup and orange squash is what I used. I have tried the same with Rasna too. See notes to know how to use rasna in this ice gola.
ice-gola-recipe
Ice gola is too easy to make at home quickly. All you need is ice cubes. Ice cubes when crushed in mixer, gives less volume so you may need two trays full of ice to get 2 or 3 ice golas. But more than making and eating, capturing it is too too tricky and messy. I have made this quite few times and tried once clicking this three weeks back, but I could not click it properly. Today too what it was in my mind, I could not capture, I was just making sure to give a decent picture and clicked indoor in an AC room Blushing. This is a wonderful summer treat for your family and yourself. Do try it.
rose-flavor-ice-gola


Ice gola recipe

Recipe Cuisine: Indian  |  Recipe Category: Popsicle
Prep Time: 15 mins     |  Cook time: 0 mins     |  Serves: 3

Ingredients

Ice cubes – 30

Any flavoured syrup/ squash – 9 tblsp

Lemon juice – optional

Method

  1. Place few ice cubes at a time – upto half the mixer and crush it well until it resembles fine icy grains. The mixer will get stuck if you over load, so few at a time. Act quickly to finish crushing all the ice cubes. 1-grind
  2. In a metal or plastic tumbler, spoon the ground ice and tap well so that the ice gets packed without any gaps. Once the tumbler is full, insert a popsicle stick or a skewer like me and press around again to make the ice tight and hold the stick. 2-tap
  3. Gently invert the tumbler and pull out of it and pour your desired squash/ syrup over this. You can squirt lemon too if you want. Serve immediately with a tumbler to collect the dripping. 3-pour

Notes

    • You should make this super quick, otherwise the crushed ice will easily melt in this hot summer.
    • If using rasna, make a super thick juice with lots of rasna powder (instant mix with sugar) and pour over the ice. Any choice of your flavour.
    • The syrup you pour should be thick, otherwise it will easily melt away the crushed ice.
    • If you are healthy concious and want to try with fruits, try granita rather than this ice gola.
    • Make only 2 or 3 at a time and serve then and there, otherwise you may not be able to handle it.

This is too good to drink the juice alone from the ice and kids too will be exited to have this. I used my rose syrup and orange squash.
orange-ice-gola

Sabtu, 11 April 2015

Kiwi lime popsicle recipe | Kiwi recipes

kiwi-lime-popsicle-recipe
Kiwi is one healthy fruit we get almost all the time in Singapore. First few times when I bought the fruit for trying it out, it was bit sour, I thought that’s the way it would be. But last year I got well ripen fruits and it was really good. I made this popsicle and sent to Kungumam Thozhi, tamil magazine’s supplementary 30 summer recipes. I didn’t took step by step pictures when I made all those popsicles, so I made this again and clicked. I like to make this always coz of the lime flavour in this popsicle and I love the colour of the kiwi fruit Batting Eyelashes.
kiwi-lime-popsicle


Kiwi lime popsicle recipe

Recipe Cuisine: Continental  |  Recipe Category: Dessert
Prep Time:10 mins Plus freezing time     |  Cook time: 0 mins      |  Serves: 2

Ingredients


Kiwi – 2

Lime – 1

Sugar – 3 tblsp

Lime zest – 1/4 tsp

Method

  1. Cut Kiwi into two and slice two circles, that we need later and keep aside.1-slice 
  2. With a spoon, scoop the pulp of the fruit and collect in the blender. 2-scoop
  3. Scrap the lime in a fine grater to collect lime zest. Squeeze in the lime to the scooped fruit. 3-scrap
  4. Add sugar and blend well to make a smooth puree. Add the lime zest.4-pure 
  5. Pour to the popsicle moulds and place the fruit slice on top of it to cover the mould. Insert the popsicle stick through the fruit slice.5-pour 
  6. Freeze for 6-8 hours or overnight and to unmould, show the popsicle mould under tap water for a minute and gently pull it out.6-ready

Notes

  • Lime adds a great flavour and goes well with kiwi fruit. so does the lime zest, adds a pleasant sweet flavour.
  • If you want, you can add kiwi fruit bits inside the mould as well.

Treat yourself and your family this summer with this super healthy pops as well as tasty ones.
kiwi-lime-popsicle

Kamis, 26 Maret 2015

Paneer Quesadilla in griller

quesadilla-using-grillerMore than posting a paneer quesadilla recipe, here I am excited to post this idea of using the griller plate of the sandwich maker for making this quesadilla. I have posted chocolated sandwich using this griller plate before, after that, I tried making hara bhara kabab in this, but the heat was not just enough for kababs. After that, this is one successful use of the griller plate in the sandwich maker. This idea is again from my friend Sangeeta, she have asked me to try this as she makes this very often. This is just an idea, so use your imagination for making any quesadilla with leftover dry sabji, leftover chapati with some grated mozarella cheese. So great way to use up the leftover rotis. If you have leftover roti, make some stuffing and do this, if you have some sabji make roti and use it up in this as a snack for your hungry family who comes hungry to home. You can also use store bought wheat tortillas to make it easy. You can also make Kathi roll, the same way. Just roll your favorite and grill in between the plates. Genius right? Thanks to Sangeetha. You can make the same in waffle maker plates too.
quesadilla-in-griller


Paneer quesadilla recipe

Recipe Cuisine: Indian  |  Recipe Category: Snack
Prep Time:10 mins     |  Cook time: 15 mins     |  Serves: 3

Ingredients


Tortillas / chapati -  6

Paneer cubes – 1 & 1/2 cup

Onion – 1

Capsicum – 1

Red chilli powder – 1 tsp

Chaat masala – 1 tsp

Lettuce (Optional) – few

Tomato sauce – As needed

Mozarella cheese, grated – 1/2 cup

Salt - as needed

Oil – 2 tsp

Method

  1. Thaw paneer, soak in hot water and drain, crumble it roughly. Heat kadai with oil and fry onion and capsicum for a minute. Add crumbled paneer, red chilli powder, chaat masala and salt (Chaat masala has salt so add less). 1-stuffing
  2. Mix in medium flame. Keep a side. Heat the sandwich maker with griller plate. In a chapati place a leaf of lettuce, spread a tblsp of sauce. 2-ready
  3. Spread the paneer filling, 2 tblsp of  mozarella cheese and cover up with another chapati. If your chapati is big, you can just use one and fold it into half.3-spread 
  4. Place it in the hot grill and close. Grill for 4 mins or until golden lines appear. Slightly rotate the quesadilla and grill again for 2 mins. 4-grill
  5. Cut into quarters to serve.5-ready

Notes

    • Make sure the chapati is thick enough.
    • Lettuce is optional. And you can use any tomato based sauce to suit your taste.
    • Use only cheese like mozzarella which doesn't melt and flow much. Also never use too much cheese as it will ooze out.

Serve hot with any cheesy dip or tomato sauce. Check out my rajma quesadilla too.
paneer-quesadilla

Kamis, 19 Maret 2015

Eggless Brownie recipe | Eggless brownies

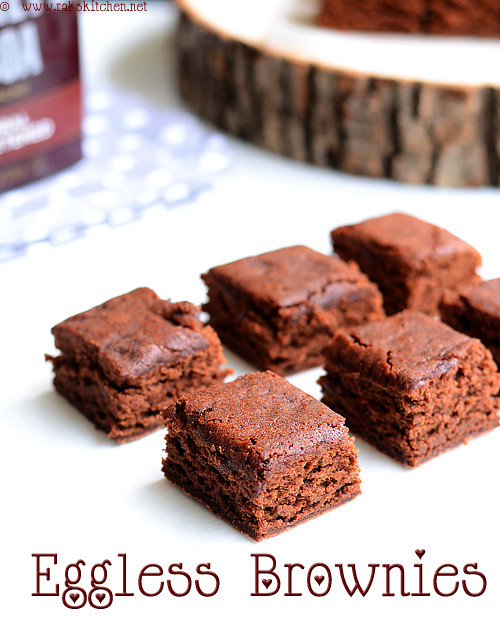
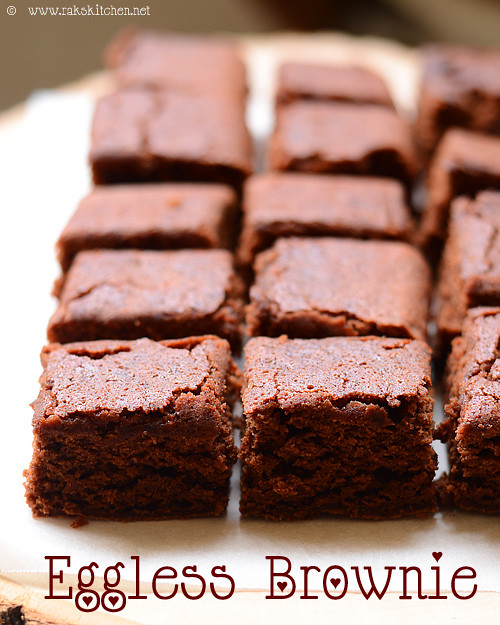
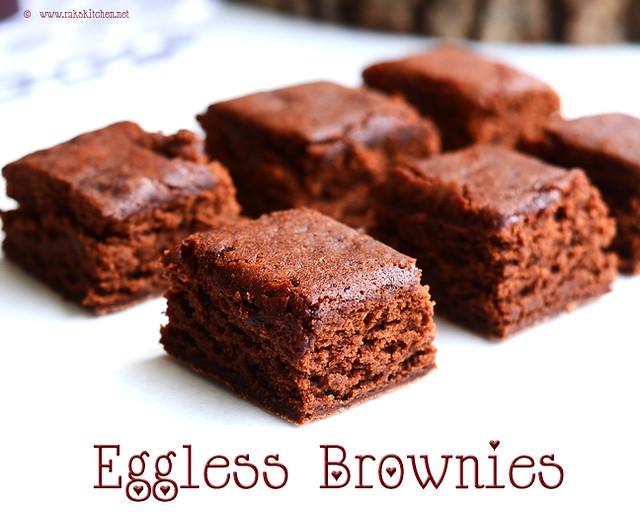
eggless-brownie-recipe My old post yoghurt brownies was the one and only attempt I have made to post an eggless brownies in my blog. Other than that, though I have tried one or two for visiting relatives, I have not attempted to post one. I dont bake mostly to avoid my intake of sugar, all purpose flour. If I in case crave for brownies, famous amous is always there and I can buy 2 or three and indulge. Its better than baking and end up eating the whole thing. Yeah no one eats baked goodies here at home. But Aj was asking me if I could bake an eggless brownie for his last day class party for past one month. He wanted to tell his friends and teachers about my blog and with something for them to taste as well. So it seems they planned for this and told me a month ahead and kept on check with me when I should shop ingredients and when I should bake…almost 5 days a week since then. Yeah, over excited boy! That Aj Tongue!!. So I chose this eggless brownie from Gayathris cookspot, where there is a lot of great baking recipes. I halved the recipe and made in few batches (as I had small baking pan). It came out really good.
eggless-brownies 


Eggless brownie recipe

Recipe Cuisine: Continental  |  Recipe Category: Dessert
Prep Time:10 mins    |  Cook time: 30 mins     |  Makes: 16

Ingredients


All purpose flour – 1 cup + (2 tblsp & 2 tsp)

Coco powder unsweetened – 1/3 cup

Sugar – 1 cup

Instant coffee – 1/2 tsp

Baking powder – 1 & 1/4 tsp

Butter – 1/4 cup

Salt – 1/4 tsp

Method

  1. Preheat oven at 180 deg C. In a heavy bottomed pan, mix  the 2 tblps + 2 tsp flour in 1/2 cup of water. Heat it over the stove to make a thick paste. transfer it to the mixing bowl and let it cool down.
  2. 1-mix
  3. In the same pan, add butter and melt it. Switch off the flame. Add coco powder and using a whisk, make it smooth.
  4. 2-choco
  5. Add coffee (dissolved in a tsp of warm water – I added as such but it didn’t dissolve so dissolve and add), sugar to the cooled flour paste and mix well. It will turn watery.Add the coco + butter we melted to this and mix until smooth.
  6. 3-mix
  7. Add baking powder, flour,salt and mix well. The batter will be thick as shown in the next step, so dont panic.
  8. 4-mix
  9. Transfer to a greased pan (8 *8 inch square) - lined it with a greased butter paper if possible. Transfer the batter to the baking tin and bake for 23 - 25 mins at 180 deg C. Mine took 25 mins.
  10. 5-bake
  11. Once done, set aside for 10 mins and later invert it to a wire rack. Cut into squares using a knife.
  12. 6-ready

Notes

    • Note the consistency of the flour paste we prepare in step 1. If its watery, then your batter consistency also will change.
    • You can add walnuts or pecans to the batter, will be good to have the crunch. The brownie was very sweet for me and nuts will be good to balance it.
    • I used unbleached flour for a batch and it worked fine as well.
    • Baking time may vary depending on your oven. So keep an eye after 23 mins.

Have it warm heated up in microwave with ice cream, its bliss! Hope kids enjoy this. 
eggless-brownie

Senin, 16 Maret 2015

Eggless waffles recipe | Eggless waffle recipe

eggless-waffles 
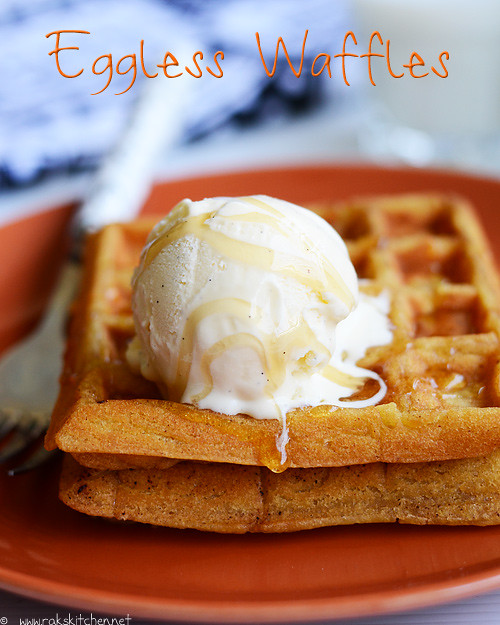
When I bought my sandwich maker with 3 interchangeable plates, one among that was this waffle maker plate. I have seen people go mad for waffles. But I knew it will be eggy and never tasted one so far. When I made this for the first time, I was not sure about the texture and I made it soft like pancakes. Then later I asked my friends, they told it should be soft and spongy inside, crisp outside. I tried from a recipe from this blog. After that, I have tried 4 times and finally could come up with a keeper recipe. This recipe is easy and comes out perfectly. You can try this out for your kids breakfast and they will sure enjoy it for a change from their regular breakfast.
  eggless-waffles-recipe


Eggless waffles recipe

Recipe Cuisine: Continental  |  Recipe Category: Breakfast
Prep Time:10 mins    |  Cook time: 16 mins     |  Makes: 4

Ingredients


Self raising flour* - 1 cup

Baking soda - 1/4 tsp

Brown or white sugar - 1 tsp

Butter, melted- 2 tblsp

Milk - 1 cup

Vanilla essence – 1 tsp (optional)

Lemon – 1/2 tsp

*Self raising flour can be replaced with All purpose flour (Maida) 1 cup + 2 tsp baking powder + 1/4 tsp salt.


Method

  1. Mix flour, sugar, baking soda (all dry ingredients) first with a whisk or you can sieve it twice too. Then add melted butter, milk at room temperature, essence if adding and whisk to a smooth batter. Lastly add lemon juice.
  2. 1-mix
  3. Heat the waffle maker meanwhile. Grease all the parts of the plate with butter or any spray. Pour a ladle full of batter, just to cover the plate. Do not add more otherwise will overflow in the sides. So while pouring itself, pour everywhere in the plate instead pouring at a same place.
  4. 2-pour
  5. Close the lid and cook as per the cooking time instructed in your waffle maker manual. Mine takes 3 & 1/2 to 4 minutes. Take out with help of a tong or spatula.
  6. 3-ready

Notes

    • Oil in place of butter also should work fine.
    • Lemon helps in reacting with the baking powder and soda and makes it soft, pourous inside and crisp outside.
    • Do not add  more baking soda, or powder or lemon juice than mentioned for this recipe, otherwise it may not turn out well.

Waffles tastes best when hot. Serve it with honey, or maple syrup or a scoop of your favorite ice cream. Or even Nutella.
eggless-waffles-with-self-raising flour

Kamis, 29 Januari 2015

Cauliflower pakoras recipe | Gobi Pakora

cauliflower pakora recipe    
Many of you should be wondering why silence and no post updates from rakskitchen. I took a short break as I am in Chennai now for some family function and other works. I thought I should schedule and go as usual. But I was bit lazy to do that and concentrated in other things in the life. But after these days, I thought it wont be nice to leave the blog abandoned and even when Sharmi called she insisted the same, to not take a break for so long. So today after a travel, I thought I will post one simple recipe. I left my laptop too at Singapore and could not edit pictures, but some how found way to post this recipe. This recipe is passed to me after my co sis gave me a cook book from which my BIL already tried this recipe.
I will try to post something here after if I find some time otherwise will be back with bang from next week.

You may also like the crispy cauliflower fries or gobi 65, or gobi manchurian recipe.
gobi pakoras

Cauliflower pakora recipe

Recipe Cuisine: Indian  |  Recipe Category: Snack
Prep Time: 5 mins    |  Cook time: 25 mins    |  Serves: 3

Ingredients


Cauliflower  1, medium 
Self raising flour  1/3 cup 
Corn flour  1/4 cup 
Plain soda  1 can 
Red chilli powder  1 tsp 
Garam masala powder  1/2 tsp 
Turmeric  1/4 tsp 
Salt  As needed 
Curry leaves  3 sprigs 


Method

  1. Boil water with salt and turmeric mean while which, you can cut the cauliflower florets. Put the florets in the boiling water and after a minute or two drain the water.1 CAULIFLOWER PAKORAS
  2. In a mixing bowl, mix self raising flour, corn flour, salt, red chilli powder, garam masala powder. Just before making, pour the necessary soda to make a batter. 2 CAULIFLOWER PAKORAS1
  3. Transfer the drained florets to this batter. Mix carefully.3 CAULIFLOWER PAKORAS
  4. Heat oil in a kadai and once hot, transfer the battered cauliflower one by one using a spoon.4 cauliflower pakoras
  5. Fry until golden from all sides, turning once or twice to ensure even cooking. Add curry leaves and drain in paper towel.5 cauliflower pakoras

Notes

    • The batter should be in a consistency so that it gives a thin coating to the cauliflower. Not too thick, not too thin.
    • *If you don’t have self raising flour, mix and sieve 1/2 cup maida (all purpose flour) with 1/2 tsp baking powder.
    • If you keep the soda in fridge and use cold soda, it comes out more crispier.

Serve hot with tomato sauce or green chutney, with fresh cut onion rings.

cauliflower pakoras
 

Blogger news

Blogroll

About