Pages

Diberdayakan oleh Blogger.

Rabu, 01 Februari 2012

LACHHA PARATHA RECIPE - STEP BY STEP

Lachha-paratha-recipe      The first experience I had Lachha paratha was not a good one. I had in SB and it was tasting terrible. I thought it is really like that. So never ordered this if I see Lachha paratha in menu. Me and Vj both love the ‘Maida parotta’ and kurma. I used to eat many times before, but now a days due to health and weight constraints, we avoid having maida parotta.       But 2 weeks back when I met Jey and Nags for lunch at Mayura, we ordered lachha paratha. When I tasted it, it was really awesome! It just melted in my mouth and crisp here and there too. I loved it and even at the same instant, I decided to try at home. And today I tried just 2 and it tasted great. Then I remembered, when I was a kid, my mom and grandma used to try this way when they roll chapati and I used to like the process of making :)  I can now make this often for my lunch! Lachha-paratha

Lachha paratha recipe

Recipe Cuisine: Indian  |  Recipe Category: Lunch/ Dinner
Prep Time: 15 mins    |  Cook time: 10 mins    Makes: 4

Ingredients

Wheat flour  1 cup 
Ghee  1 tblsp 
Salt  1/2 tsp 
Water  As needed 

Method

  1. Mix flour,a tsp of ghee,salt well and then sprinkle water enough to make a smooth dough. But let it be stiff, not too soft. Otherwise it will be difficult for handling.   1-lachha-paratha-stepwise 
  2. Divide into 4 equal balls. Roll into big circle,as big as our tawa. Then apply a tsp of ghee evenly on the top. either use your hands to spread or a brush [like I did ;) ]2-lachha-stepwise
  3. Sprinkle a tsp of flour and spread the flour evenly and start making fleets.3-lachha-stepwise
  4. After fully done, twist and coil (roll) to make a flat round.4-lachha-stepwise
  5. Roll carefully, without applying too much pressure to ensure the layers are still there. Heat tawa and drizzle oil and cook in medium flame(with oil drizzled) both sides until golden brown. Use the spatula and gently press while cooking to ensure even cooking.5-lachha-stepwise
Notes
  • You can use even oil in the place of ghee, but ghee is recommended.
  • The finer the fleets, you get more layers. Since this is the first time I made, I made bigger fleets.
  • Always cook in medium flame with constant pressing with the laddle to ensure even cooking.
Pat gently the sides of the paratha with kitchen towel to highlight the layers. You can again smear ghee or butter when it is hot. Enjoy hot with simply dal or dahi and pickle! lachha-parantha

Selasa, 31 Januari 2012

GOBI MANCHURIAN DRY RECIPE

gobi-manchurian-recipe
Gobi 65 and gobi manchurian dry, both are my family favourite. So where ever we go, we search for any on of the above in the menu card. Now a days Indian Wok is our favourite eat out, and the reason being they serve best gobi manchurian that is really dry. It will be crisp, still juicy and we all are now big fans of this one. Aj is just crazy about it. I tried my best to try it out at home, the only thing I could not get is to maintain the crispiness. But still my family enjoys my version of the dish.
gobi-manchurian-dry

Gobi Manchurian dry recipe

Recipe Cuisine: Indian  |  Recipe Category: Starter
Prep Time: 15 mins    |  Cook time: 30 mins    Serves: 2

Ingredients

Cauliflower  1 medium sized flower 
Onion  1, very finely chopped 
Garlic 6 cloves, very finely chopped
Spring onion  3-4 sprigs 
Chilli tomato sauce  1 tblsp 
Soy sauce  2 tsp 
Pepper powder  1 tsp heaped 
Salt  As needed 
Sugar  1/2 tsp 
Maida/all purpose flour  2 tblsp 
Corn flour 2 tblsp
Sodium bi carbonate  2 pinches 
Oil  As needed

Method

  1. Clean the cauliflower by keeping it immersed in hot water with salt for 10 minutes. This way, its also being parboiled.Make a batter with corn flour, all purpose flour and cooking soda, thick enough to coat the cauliflowers. You can either dip the well drained florets one by one in the batter or just mix all of it with the drained florets and deep fry. Just make sure there is enough batter to coat the florets. Deep fry until crisp and light.Keep aside.1-deepfry
  2. In a wide pan, add 3 tblsp oil and add chopped garlic. Give a quick stir and then add finely chopped white part of the spring onion and the chopped onion and fry till transparent. Add both sauces, salt, sugar, pepper and mix well.2-fry
  3. Add the deep fried cauliflower florets and toss well to mix it evenly. Lastly add finely chopped green part of the spring onion and mix well for a minute.3-add
Notes
  • Adding lots of garlic and pepper adds flavor to this dish.
  • You can also add some capsicum and chopped coriander leaves for extra flavour.
  • Finely chopped ginger can be replaced with garlic.

Serve hot immediately as starter or with any Chinese style rice / noodles….!

gobimanchuriandryrecipe

Kamis, 26 Januari 2012

CABBAGE VADA RECIPE / CABBAGE VADAI RECIPE

cabbage-vada-south-indian Cabbage vada /vadai tastes similar to our medhu vadai. You may never know it has cabbage. Cabbage tastes similar to onion in this vadai.  The preparation is also exactly same as the medhu vadai, but only that insteaad of onion, we add cabbage. My family likes it. There are many versions of cabbage vada. This is urad dal version, you can also make this like we make parruppu/masala vadai. Best to serve as snack with coffee/ tea when you host guests, they will be surprised with this unique ingredient…
Cabbage-vada-recipe

Cabbage vada recipe

Recipe Cuisine: Indian  |  Recipe Category: Snack
Prep Time: 3 Hrs    |  Cook time: 20 mins    Makes: 10

Ingredients


Urad dal (white,whole)  1/2 cup 
Finely chopped cabbage  1 cup 
Green chilli  2 
Ginger,chopped finely  1 tblsp 
Coriander leaves, chopped  2 tblsp 
Curry leaves  1 sprig 
Asafoetida powder  a generous pinch 
Salt  As needed 


Method

  1. Wash and soak urad dal for 2 – 3 hours. Drain water completely and grind it with 2 tblsp of water in a mixer. Do not grind for long time, just use juice/inch/pulse option and grind slowly, wipe the sides of the jar frequently. Add a tblsp of water each time when you open the lid. Grind to a smooth thick paste. Add all the ingredients to this and mix well in a bowl.
  2. 1-ingredients
  3. Wet your hands and make a smooth ball, make a hole in the middle using your thumb and drop carefully in hot oil in the kadai.
  4. 2-making
  5. Cook both sides in medium flame until golden brown. Drain in paper towels.
  6. 3-fry

Notes
  • Use less water while grinding. You can mix a tsp of rice flour in the batter to make the vada extra crisp!
  • Add salt only just before you are going to make.

Serve hot with sambar or any coconut chutney. Yummy with both or as it is…

cabbage-vadai

Selasa, 24 Januari 2012

Eggless chocolate muffins recipe | No butter

eggless-chocolate-muffins

Chocolate muffins are loved by almost every one of us. I wanted to try my hands on muffins for long time, but could not decide on a recipe. I bookmarked a recipe but it had complicated measurements, so at last minute, I got the recipe from here. And the recipe dint disappoint me. It came out good. It tasted similar to the eggless chocolate cake. With simple ingredients, it does comes out sinfully delicious. It is very easy too, that beginners in baking, like me, can try it out without giving a second thought. The muffins were soft and chocolaty, do try it out yourself to believe me!

eggless-chocolate-muffin


Eggless Chocolate muffins recipe

Recipe Cuisine: Continental  |  Recipe Category: Dessert
Prep Time:10 mins soaking time    |  Cook time: 25 mins     Makes: 8

Ingredients


All purpose flour - 3/4 cup

Coco powder - 2 & 1/2 tblsp

Sugar - 1/2 cup

Baking soda( bicarbonate of soda) - 1/2 tsp

Salt - 1/4 tsp

Oil - 1/4 cup

Cold water - 1/2 cup

Vanilla essence - 1 tsp

Lemon juice / vinegar - 1 tsp


Method


  1. Sieve flour, coco and baking soda together tice to ensure even mixing and then mix in the salt and sugar. In another bowl, mix oil, cold water and vanilla. Reserve the lemon juice.Mix the dry ingredients and wet ingredients well until sugar gets dissolved.
  2. chocolate1
  3. Pre heat oven to 190o C .. Before you are just going to bake, mix in the lemon juice and stir well. Spoon the batter to the muffin liners in the baking tray. Fill just 3/4th.
  4. chocolate2
  5. Bake for 25 to 30 minutes or until tooth pick inserted comes out clean. Better keep checking after 20 minutes. Mine got baked after 23 minutes itself. Cool down the muffins in a wire rack, after carefully taking out from the baking tray.
  6. chocolate3

Notes

  • I used fine grain sugar, better to use it as it gets dissolved easily.
  • You can use 1/2 tsp of orange zest to enhance the flavour.
  • Bake a day before you want to eat.
Enjoy the chocolaty muffins. Give a day for the flavours to get incorporated well, though it tastes good immediately. So if you want to eat tomorrow, make today and keep! chocolate-muffins-recipe+1

Kamis, 19 Januari 2012

VANILLA CARAMEL MILKSHAKE

vanilla-caramel-milkshake
     I am not a coffee/tea person and always order some cold drinks if I go to coffee shops. And I got addicted to this drink when we went to Phuket once. A restaurant inside the resort where we stayed had this in their menu and me and Aj ordered this thrice and shared. It was the best milkshake I have ever had. Tasted like heaven.  Then I started making this at home with the sundae syrup, to finish the ice cream tub. I rarely make though to watch my weight.
     Vj doesn't like cold milkshakes except Sharjah shake. I have to soon post that too here. Its one of my favourite too. For this milk shake, its very flexible, you can increase or decrease the ice cream quantity,use low fat options and you may also make your own caramel if you want. Refer this post to see how to make caramel syrup. And be creative in choosing the sundae syrup too for different flavours, like strawberry, butterscotch, chocolate… Kids would love it and it will be filling for them if you give after their un finished breakfast.
caramel-vanilla-milkshake


Ingredients for 1 serving

Milk 1 cup
Caramel syrup 3 –4 tblsp
Vanilla ice cream 2 scoops

Method

  1. Place everything in the blender, and whip until everything blends well. Serve immediately.1-caramel2-caramel 
     Pour into the serving glass and you can top with your favourite toppings like nuts or bit of the caramel syrup or even a scoop of ice cream.
pour2

   I topped with the coloured sprinkles to make it colourful and I am sure your kid will also love it as its colourful and catchy to eyes.

vanilla-milkshake-recipes
Notes
  • Adjust the caramel syrup and ice cream to balance the sweetness of the milkshake and depending on which flavour you want more.

Kamis, 12 Januari 2012

Paneer bhurji recipe | Easy paneer recpies

paneer-recipes-paneer-bhurj
Paneer bhurji is one of the easiest paneer recipes that can be made with less effort and time. This is the first time I am making this in spite of that its so easy. I had this at my friend Sangeeta’s place when she was here. Now its almost 3-4 years, but this is the first time I am making this at home. I loved it a lot and its simple way to make too! This can be a perfect lunch box idea, you can even wrap the paneer bhurji in roti for your kids. They would love it.
I made this with store bought frozen paneer, you can even try making this with homemade paneer. If you have curdled milk, just try drain the milk and make paneer and try paneer bhurji, you can utilize the curdled milk in this way! You can be creative with this recipe, try adding peas or carrot, it will be nice.
easy-paneer-bhurji-recipe

Paneer bhurji recipe


Recipe Cuisine: Indian  |  Recipe Category: Lunch sides
Prep Time: 5 mins    |  Cook time: 10 mins    Serves: 3

Ingredients


Paneer cubes - 2 cups

Onion - 2

Capsicum - 1

Red chilli powder/ pepper powder - 1/2 tsp

Garam masala powder - 1/2 tsp

Dhaniya/ coriander seeds powder - 1 tsp

Lemon juice - 1 tsp

Milk - 2 tblsp

Ginger, finely chopped - 1 tblsp

Green chillies - 2

Coriander leaves, finely chopped - 2 tblsp

Jeera - 1 tsp

Oil - 1 tblsp

Method

  1. If you are using frozen paneer, either thaw it until room temperature or boil water and keep immersed for 10 minutes. Drain the water completely and crumble it in a mixer(just add in two batches and give it a run)
  2. 1-boil,drain,crumble
  3. Heat a pan with oil and splutter jeera, add finely chopped ginger and green chillies, followed by finely chopped onion. Fry till transparent and add the chopped capsicum.
  4. 2-tadka,fry-onion,capsicum
  5. Fry for a minute without changing its crispiness and add coriander leaves, all the powders and give it a quick stir without burning them. Add milk, salt and cook for 2 minutes until the milk evaporates.
  6. 3-add-masala,milk,fry
  7. Now lastly add crumbled paneer and mix well. Fry for 2 minutes or until dry and add the lemon juice and mix well.
  8. 4-add-panner,fry until dry
Notes
  • If you want to add frozen peas, cook it in microwave and add it in the end of step 2. For carrots, just add it after onion and fry along.
  • You can omit lemon juice and add a tomato chopped along with capsicum.
  • I used tri coloured capsicum.
  • You can skip ginger too!

Serve hot with roti or naan or any stuffed parathas too…Wrap it or just have it as a side dish, you can even eat its as such! Tastes awesome and damn easy to make!

paneer-bhurji-recipe

Jumat, 30 Desember 2011

PIZZA BUNS RECIPE

pizza+buns
Wishing you all friends and readers a very Happy and Prosperous New Year! Life is a bit busy these days, so taking a short break, see you guys with more exciting recipes next year, meanwhile enjoy this recipe I posted as guest post at Sandhya's kitchen...This recipe idea flashed,when I saw a pamphlet I got from 7 eleven introducing Pizza bites. I loved the idea and thought it would be easy to make at home. As I have been making pizza from the scratch for quite a while now and have tried several buns, I was pretty confident in try these and enjoyed making these. This could be an easy party snack idea, kids would be super excited to have it and sure we can also enjoy this. The stuffing is flexible so you can experiment it with your favourite topping,let it be simple like what I have used or add on your favourites like black olives,mushrooms…it’s your choice! 
pizza-buns-cut 


Pizza buns recipe

Recipe Cuisine: Continental  |  Recipe Category: Snack
Prep Time:1 Hr     |  Cook time: 18 mins     Makes: 8

Ingredients


All purpose flour - 1 & 1/2 cup

Milk - 1/2 cup

olive oil - 1/8 cup

Salt - 1 tsp

Sugar - 1 & 1/2 tsp

Active dry yeast - 1 tblsp

For the filling

Capsicum,chopped - 1

Onion - 1

Tomato(optional) - 1

Grated mozzarella cheese - 1/2 cup

Pizza sauce or any tomato based sauce - 2 tsp

Italian herb of ur choice - 1 tsp

Red chilli flakes - 1 tsp

Salt - 2 pinches

oil - 2 tsp

Method

  1. Heat milk until lukewarm,dissolve sugar and yeast. Let it rest for 10 minutes. After 10 minutes the mixture would have been raised to frothy, proving that the yeast is active. If not,your yeast is not active and use active yeast
  2.  
  3. Meanwhile, take flour in a large bow and make a dent in the middle. Add salt, oil and the yeast mixture in the dent and make a smooth pliable dough. If sticky sprinkle little more flour,if too dry sprinkle some water. The dough should be smooth and pliable.
  4.  
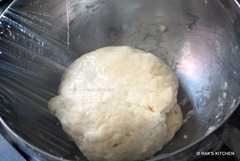
  5. Let it rest for 1 hour, wrap the bowl with cling wrap. After an hour the dough should have been raised. Punch it down and knead to make it smooth.
  6. DSC_7424 DSC_7432
  7. Make equal sized balls and arrange in a greased baking tray.Meanwhile prepare the filling. Heat a pan with oil and fry capsicums,tomato and onion for just a minute. Cool down and add sauce, cheese, Italian seasoning, salt and chilli flakes . Mix well.
  8. DSC_7428 DSC_7436
  9. Flatten the prepared dough balls and keep a small lemon sized ball of the filling.
  10. DSC_7437 DSC_7443
  11. Pinch the edges towards centre to cover the filling as shown in the picture. Arrange in the baking tray with the sealed side down. Make sure you have sealed properly,otherwise, the cheese will ooze out.
  12. DSC_7441 DSC_7442
  13. Pre heat the oven to 190o C and till then brush the buns with milk little and bake it for 18-20 minutes or until the buns start becoming golden brown on the top. Brush generously with butter after done.
  14. DSC_7445 DSC_7446

Notes

  • While sealing the buns, you can use water if you find it difficult to do so.
  • Adjust the baking time accordingly. Keep an eye on the buns after 15 minutes.
  • You can sprinkle white sesame seeds or even chilli flakes on the top before baking the buns.

Serve hot with tomato ketchup or chilly sauce! Enjoy it with your favourite drink!
Pizza-buns-1


Blogger news

Blogroll

About