Pages

Diberdayakan oleh Blogger.

Kamis, 31 Juli 2014

Vada curry recipe - Steamed version

vada curry steamed
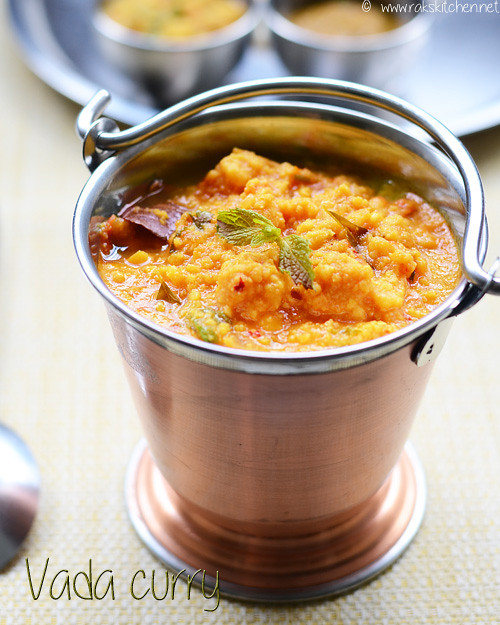
As I posted last in the breakfast menu11, here I am  with the vada curry recipe . This is perfect for dosa for me, loved it a lot with soft spongy dosa. Some suggest this for appam, poori or chapati too. I tried with chapati, it was good. Yet to try with poori and appam. I can eat vada curry as such even though its a side dish. It gives so much volume, so its perfect when you have get-togethers  or have guest at home. You follow the same recipe and make with left over masala vadais too. Again thanks to Vilasini & Viji for the recipes.
vada-curry recipe


Steamed vada curry recipe

Recipe Cuisine: Indian  |  Recipe Category: Side dish
Prep Time: 3 hrs soaking time    |  Cook time: 30 mins    Serves: 6

Ingredients


Channa dal   1/2 cup 
Red chilli   4 
Fennel / Spambu/ Saunf   1 tsp 
Onion   2 
Tomato   3 
Ginger garlic paste   1 tsp 
Red chilli powder   1 & 1/2 tsp 
Coriander seeds powder   1 tsp 
Turmeric   1/8 tsp 
Salt   as needed 
Mint leaves   10 
Coriander leaves, chopped   2 tblsp 
Curry leaves   1 sprig 


To temper

Oil 2 tblsp
Cinnamin 1 inch piece
Cardamom 1
Cloves 1
Bay leaf 1
Jeera/ cumin seeds (optional) 1 tsp


Method

  1. Soak channa dal for 3 hrs. First grind chilli, fennel and salt.
  2. 1-soak
  3. Then add the drained channa and grind coarsely. Do in batches to ensure even grinding. Do not grind smoothly.
  4. 2-grind
  5. Grease idli plates and fill the moulds with the ground mixture, make a dent at the middle to ensure easy cooking. Steam cook for 8 minutes.
  6. 3-steam
  7. Once cooled, break it roughly. I forgot to add curry leaves before steaming, so added after breaking. Heat a pan with oil and temper with the items given under ‘To temper’ table in order.
  8. 4-temper
  9. Add finely chopped onion and fry till transparent. Add ginger garlic paste and fry for a minute in medium flame. Add finely chopped tomatoes and all the powders – red chilli powder, dhaniya powder (coriander powder) and turmeric powder. Add required salt for the gravy.
  10. 5-masala
  11. Fry for a minute or until the masala blends and becomes mushy. Add 3 cups water. 6-masala-cook

  12. Bring to boil and add the crumbled dal and simmer for 10 minutes.
  13. 7-boil
  14. Once the oil floats on top and the gravy becomes thicker, garnish with chopped coriander and mint leaves.
  15. 8-garnish

Notes

    • Add enough water as it requires lots of water.
    • Min leaves adds very nice flavor to the gravy.
    • If using masala vada, use 8 vadais.
    • You can add 2 slit green chillies if you want extra hot gravy.

Serve hot with hot set dosa  - the dosa you see below is nothing but soft thick dosas, made from idli dosa batter. vada-curry-recipe  

Senin, 28 Juli 2014

Badam kheer recipe | Almond dessert | Indian dessert recipes

badam-kheer-recipe
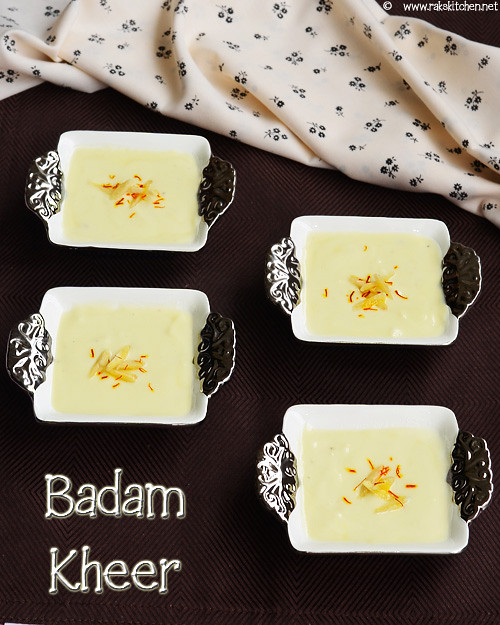
I know my readers have been expecting this recipe for a long time now. Really long time, for years. I wanted to post it for long time too, as my readers Google and search as “ Badam kheer Raks kitchen”. Still it took this much long for me to post this, I am really sorry. But now I got a chance to try this dessert for a friend who came here for a short stay. I also wanted to picture this in the new serving bowl set I got from Currim boysBig Grin.  I am making this for only may be second time in my life, so curelessly I made with 1/2 cup of badam and got a lot of kheer that I kept in the fridge and had for few days Rolling Eyes. So I have halved the recipe here to keep it simple.  And this post is on time for Ramzan, and I wish all the reader friends who ever celebrating a Happy Ramzan Party
I will post the vada curry recipe, next, I promise Batting Eyelashes.
badam-kheer-rakskitchen

Badam Kheer recipe

Recipe Cuisine: Indian  |  Recipe Category: Dessert
Prep Time: 15 mins    |  Cook time: 25 mins    Serves: 4

Ingredients


Badam / Almonds  1/4 cup 
Milk  2 & 1/2  cups 
Saffron  A pinch 
Cardamom  1 
Sugar  1/4 cup 
Ghee  2 tslp 

Method

  1. Bowl milk and soak the saffron separately in lukewarm milk. Keep boiling the milk in low flame.
  2. 4-boil
  3. Boil water and add almonds to it. Let it boil for a minute. Switch off the stove, drain and wash under tap water to cool down.
  4. 1-blanch
  5. Now you will be able to peel off the skin. Peel all the almonds.
  6. 2-peel
  7. Reserve some 6 almonds for garnish. Grind rest of the almonds with little milk to a smooth paste.
  8. 3-paste
  9. Add the ground almond paste, soaked saffron and sugar and mix well.Bowl until you get the desired consistency. Keep stirring every now and then, to avoid burnt bottom. It could take around 8 to 10 minutes in medium flame.
  10. 5-boil
  11. Slice the reserved almonds into thin strips. Heat ghee in a pan and fry the almonds for a minute and add it to the boiling kheer. Switch off the flame.
  12. 6-fry

Notes

    • Adjust sugar as per your need.
    • The consistency can be adjusted as per your wish. If you want more thicker side, use less milk.If you want it like badam milk, you can use less badam.
    • Be generous in adding elachi and saffron as it lends a nice flavor to this kheer. Otherwise the smell of almonds may be dominating.
    • Tastes best when served chilled, preferable the next day.
    • If you want to make badam milk, add a small piece of cinnamon, 1 clove and a mustard size edible camphor to the boiling milk and reduce the badam to half.

Serve chilled as it taste best when served chilled. I love this badam kheer especially with the badam garnish which adds a nice touch this here and there.
badam-kheer

Sabtu, 26 Juli 2014

Breakfast menu 11 - Vada curry, dosa, mint chutney, coffee

Dosa, vada curry, mint chutney

Before I went to Chennai this time, for a while I made list of places where I should go, what I should buy, what I should eat etc… Yes, when ever I go to India, many things will be in my mind that flashes now and then but will forget everything when I go there. So I make a list. The shops I should go and buy cloths, the restaurant I should go and eat, the places I should go and see… Though I make a big list, I will be able to do only few things. Still no regrets, there is always the next timeRaised Eyebrow. So this time, eating vada curry is one such thing in my to try list in restaurant.
So once when we went to Anna nagar for shopping, we went to Saravana bhavan and I ordered this set dosa with the choice of vada curry. And this is the first time I am eating vada curry in a restaurant. It was very mild looking and tasting similar to mixed veg kurma. I could not see any vada in that, everything looked mashed up. I don’t know if that’s how its supposed to be, still loved it. It was completely different from what I posted here as vada curry recipe. When I posted that recipe itself, two readers (Vilasini & Viji) had left their recipes, asking me to try and both were very authentic. I loved that concept of steaming too as its less fat. I guessed that would come out similar to what I tasted in saravana bhavan. So I tried it that way this time and surprisingly I could totally relate to the vada curry I ate and it was delicious. And I will post this separately as a new post sure tomorrow or Tuesday. Now on to how I prepared this breakfast menu.

Dosa, vada curry, mint chutney - breakfast menu 11

Recipe Cuisine: Indian   |  Recipe Category: Breakfast
Prep Time: 12 hr     |  Cook time:1 hr    |  Serves: 4

  1. You have to soak and grind for idli/ dosa batter the before day itself and keep the batter ready for next day. The next day, on wake up, soak channa dal for vada curry (mininum 3 hrs).
  2. After 3 hours, grind and steam for vada curry. While its steaming do the chopping works. Onion and tomato for vada curry and mint chutney. Clean mint leaves for mint chutney.
  3. Keep all the ingredients like coriander, curry and mint leaves for garnishing, ready. Once the steamed vadas are ready, mash it and keep it ready as well.
  4. Heat kadai, roast for mint chutney, temper for mint chutney, saute for mint chutney. Cool it as side.
  5. Next prepare vada curry and let it be simmered in a stove. Meanwhile which you can grind mint chutney.
  6. Once vada curry is ready, when ever your family is ready for breakfast make dosa hot. Remember, for vada curry, soft thick dosas are perfect match.
Breakfast with vada curry, dosa and chutney. I added up a filter coffee to make it more appealing, but its optional to serve along breakfast.

south indian breakfast menu ideas

Check out the recipes
  1. Idli dosa batter
  2. Vada curry recipe ( Will post this version next)
  3. Mint chutney with onion tomato
  4. Filter coffee recipe.
I didn’t had coconut, if I had I would have made coconut chutney to go with this. Check out the other chutney recipes too.

Jumat, 25 Juli 2014

Senai kizhangu curry | Elephant yam Recipes

senai-kizhangu-curry-recipe     
I never realized that I loved this senai kizhangu curry when they used to serve in our lunch at our hostel mess (SRC, Trichy). But after I finished my studies, when ever I used to remember this curry I started to crave for this. But We never made it this way in our home. We make senai  kizhangu in dosai kal (Elephant yam roast recipe) otherwise a curry similar to that and mami makes this senai kizhangu chips every time. So I always wanted to try this at home. Since vj is not a big fan of this, I never buy elephant yam. This time, I really wanted to try this, so bought and made this curry. It was different from what I used to eat at my hostel, as I made it in my way. I loved the lunch with this curry and will make it often here after when ever I get a chance.
elephant-yam-recipes


Senai kizhangu curry recipe

Recipe Cuisine: Indian  |  Recipe Category: Lunch - side dish
Prep Time: 30 soaking    |  Cook time: 20 mins    Serves: 4

Ingredients


Senai kizhangu, chopped  1 & 1/2 cups 
Sambar powder  1 & 1/2 tsp
Fennel seeds powder  1/2 tsp
Turmeric powder  1/4 tsp
Tamarind  1 tsp tightly packed
Salt  As needed

To temper

Oil 2 tblsp
Mustard 3/4 tsp
Urad dal 2 tsp
Curry leaves 1 sprig


Method

  1. Soak tamarind in hot water for 30 minutes and extract juice. Peel off the skin of the yam and chop it finely as shown in the picture.
  2. 1-cut
  3. Wash it with water and boil with salt, turmeric and tamarind water. Cook until done.
  4. 2-cook
  5. Drain and keep aside. Heat a pan with oil and temper with the items given under ‘To temper’ table, in order.
  6. 3-temper
  7. Add cooked yam, sambar powder, fennel powder and sprinkle little water. Mix well. Fry for 2 minutes and drizzle over some oil while turning. When the masala powders wafts aroma, transfer to the serving bowl.
  8. 4-fry

Notes

    • Buy elephant yam and let it sit in shelf for few days to avoid too itchy yam. As it gets older, less its itchy property.
    • While chopping, you can smear your hands with oil or lemon juice to avoid itchy feeling.
    • Cooking in tamarind water is must to avoid itchiness.
    • You can temper with fennel and avoid the powder.
    • Instead of sambar powder, you can replace it with red chilli powder 1 tsp and coriander seeds powder 1/2 tsp.
    • If you dont like fennel smell, avoid it and add a pinch of asafoetida powder while tempering.

Serve as accompaniment for rice. Goes well with any sambar and rice.

senai-kizhangu-curry

Rabu, 23 Juli 2014

Soya chunks biryani | Soya chunks recipes | Meal maker biryani

soya-chunks-biryani-recipe 
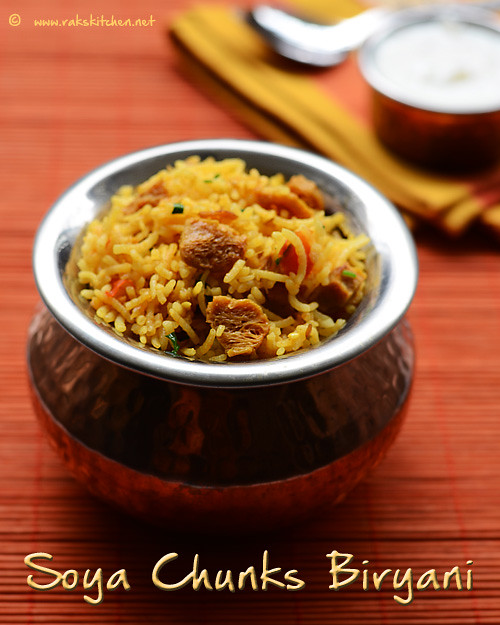
Inspite the numerous health benefits, my family does not like to eat soya chunks. Aj is fine with soya chunks curry. I am a great fan of soya chunks in kurmas. But other than us, no one likes it. Also they  will ask me weirdly that I am cooking and eating soya chunksOh go on. I too rarely cook but as Vj doesnt eat. So after a short break, I bought this Manna soya chunks pack in Mustafa. Unlike the small soya chunks I buy regularly, this was the medium sized which I am handling for the first time. But after making this biryani, the result was perfect, so I am sure I will use this pack effectively. And this Biryani recipe, though I wanted to follow a supplementary book’s recipe, I ended up making biryani in a way that I learnt from a friend (sukku kuzhambu, vada curry and pattani kuzhambu fame). She uses this recipe to make vegetable biryani. It will be awesome. But I adapted that too for my convenience. And it turned out really good and perfect.
meal-maker-biryani-recipe

Soya chunks biryani recipe

Recipe Cuisine: Indian |  Recipe Category: Breakfast
Prep Time: 35 mins    |  Cook time: 25 mins    Serves: 2

Ingredients


Basmati rice  1 cup 
Soya chunks  30 
Onion  1 
Tomato, small  1 
Curd  3 tblsp 
Turmeric powder  1/4 tsp 
Red chilli powder  1 & 1/2 tsp 
Green chillies  3 
Mint leaves  15 
Coriander leaves, chopped  3 tblsp 
Ginger garlic paste  1 & 1/2 tsp 
Ghee  1 tsp 
Salt  As needed 

To temper

Ghee or oil 3 tblsp
Cinnamon 1 inch piece
Bay leaf 1
Cloves 1
Cardamom 1
Jeera/ cumin seeds 1 tsp


Method

  1. Soak basmati rice in warm water for 30 mins atleast. I used medium sized soya chunks (it may look different in size because of camera lens).
  2. 1-soak
  3. Boil water with 1/4 tsp salt and add the soya chunks. Cook in medium flame for 10 minutes. 2-boil
  4. Rise with cold water and squeeze it till dry and again repeat it. Keep aside.
  5. 3-rinse
  6. I cut each chunk to two, its optional. Keep all the other ingredients cut ready. Then after the rice is soaked for 30 mins, boil 5 cups water and add rice to it.
  7. 4-cut
  8. Let it boil for 5 minutes or until its 90% done. Add few mint leaves torn to this, add little salt and a tsp of ghee.
  9. 5-cook
  10. Toss and keep aside. Heat a small pressure cooker with ghee. Temper with items given under ‘To temper’ table in order.
  11. 6-mix
  12. Add sliced onion, fry till transparent. Add soya chunks, ginger garlic paste and fry until dry for 2 minutes in medium flame.
  13. 7-fry
  14. Add tomato, salt, red chilli powder, green chilli and turmeric. Fry until tomatoes become soft.
  15. 8-tomato
  16. Add curd, remaining mint leaves and fry for 2 more minutes.
  17. 9-curd
  18. When it becomes thick, add 1/4 cup water and bring to boil.
  19. 10-gravy
  20. Add the cooked rice and mix evenly. Flatten with back of ladle and cover with cooker lid (I do with the pressure valve). I can keep the flame really low in my stove burner, so how much ever its is possible keep the flame low and cook for 12 minutes. You can keep over a dosa pan too if you cant put flame in low.
  21. 11-rice
  22. After 12 mins, let it stand as it is for 5 minutes and open the cooker, add chopped coriander leaves and mix gently.
  23. 12-cook

Notes

    • Soaking rice in warm water helps in rice getting cooked fast and also gives long grains.
    • I used India gate aged rice.
    • Adding ghee, salt and mint leaves immediately after draining the rice adds a lots of flavor. So do not skip it.
    • Do not cook the rice too much time before making the biryani. Make sure to use the rice as soon as it is cooked. If you keep the boiled rice for long time, it will become dry and be like uncooked rice.
    • Do not over mix as it will break the rice grains.
    • Washing and squeezing the cooked soya chunks completely, ensures to get rid of the smell.
    • You can add vegetables along this too.

Serve hot with onion raita the best or even you can add a vegetable kurma as side dish.

Check out the other soya recipes : Soya chunks curry recipe  | Soya kheema toast recipe  | Soya kheema paratha  | Soya bean dry curry

soya-chunks-biryani
 

Blogger news

Blogroll

About