Pages

Diberdayakan oleh Blogger.

Selasa, 31 Maret 2015

Palak baby corn recipe | Baby corn palak gravy

palak-baby-corn-recipe
When ever I see the Mast kalandar platter with corn palak I get way too tempted to try. Corn capsicum being a hit, I thought corn palak also will be delicious. I told Aj I am going to make this and opened the fridge to find I ran out of sweet corn stock. If I say Aj I cant make it, he would start cribbing, I was thinking what to do, suddenly found baby corn  that I got, so changed the plan with baby corn and Aj too was ok with it.  This recipe can easily be adapted with sweet corn too, goes well with simple pulao and rotis. I tried with both peas pulao and roti. Roti is my choice and pulao is Aj’s.


Palak baby corn recipe

Recipe Cuisine: Indian  |  Recipe Category: Lunch/ Dinner - sides
Prep Time:20 mins     |  Cook time: 25 mins     Serves: 4

Ingredients


Palak (Indian spinach) – 2 cups, chopped

Baby corn – 12

Onion - 1

Green chilli – 4

Ginger garlic paste – 1tsp

Amchoor powder – 3/4 tsp

Cream – 1/4 cup (or) Milk – 1/2 cup

Garam masala – 3/4 tsp

Sugar – 1 tsp

Salt – As needed

Oil – 1 tsp

To temper

Oil – 1 tblsp

Jeera / Cumin seeds – 1 tsp

Method

  1. Wash and chop palak roughly. Heat a kadai with oil, add the chopped palak along with chilli. As we have washed the palak, there will be little water retained in the leaves, it will help in cooking. Just fry for 1 or two minutes until the volume reduces.
  2. 1-sautee
  3. Cool down and grind it to puree. Meanwhile you can pressure cook baby corn. Cut into your desired shape, I chose diagonal cut. I cut each baby corn into 4-5 diagonal pieces. You can also cut into tiny cylinders. Pressure cook for 3 whistles with little water, salt and 1/2 tsp sugar.
  4. 2-cook
  5. Heat kadai with oil and temper with jeera. Add finely chopped onion and fry till transparent.
  6. 3-tadka
  7. Add ginger garlic paste and fry for a minute in medium flame. Add pureed palak, sugar.
  8. 4-fry
  9. Cook for 2 minutes, without losing the colour much. Add cooked baby corn.
  10. 5-fry
  11. Mix well, add required salt, cream. Flame should be in low. Adjust water or milk to get desired consistency.
  12. 6-add
  13. Add garam masala and mix well. Let it heat up for a minute in low flame, never let it boil in high flame, to avoid curdling.
  14. 7-add-garam

Notes

    • If you don’t have amchoor powder, fry 2 finely chopped tomatoes after onion to proceed with the recipe.
    • Something tangy should be added to balance the gravy.
    • Make sure to cook palak properly, otherwise, will end up in bitter gravy.
    • I realised I added less milk/ water, so mine looks thick, add accordingly.
    • You can top with butter or ghee while serving to enhance the taste.
    • You can replace the baby corn with a cup of cooked sweet corn too.

Serve with pulao or roti, we had with peas pulao for lunch and with roti for dinner. Both were good.
corn-palak-recipe

Sabtu, 28 Maret 2015

Easy south Indian lunch menu - 55


It’s mango season now! If you are following me in Instagram/ Facebook/ Twitter, you might have known I have already made my batch of maavadu pickle. Now I was waiting to make mango rice. I love mixed rice varieties, especially the tangy ones like lemon rice, tamarind rice and this mango rice. Got 3 raw mangoes in little India last week, made mango sweet pachadi with one and saved two for rice. It was medium sized mangoes, thought I would need 2, but used up only 1 & 1/2. I also bought vazhaithandu (banana stem) so wanted to make it when Vj at home. Last week I made banana stem poriyal, This time wanted to make something else, so made this kootu. I love this kootu, we can have it as such. It was nice to have with mango rice. I soaked 1/2 cup channa dal too for masala vadais to go with this too. Really enjoyed this simple menu today. We had plain rice and butter milk too to complete the meal.

Check out the recipes:
  1. Mango rice recipe
  2. Banana stem mor kootu recipe
  3. Masala vadai recipe
Here’s how I prepared this menu.

Easy South Indian lunch menu (55)

Recipe Cuisine: Indian   |  Recipe Category: Lunch
Prep Time: 30 mins     |  Cook time: 45 Min     |  Serves: 3
  1. I soaked for masala vada 3 hours prior cooking. First pressure cooked rice (1 cup for mango rice, 1/2 cup to use as plain rice).
  2. Mean while, chopped banana stem, cooked it. Grated mangoes and kept all the other ingredients like curry leaves, chilli, curd ready.
  3. Had grated coconut ready, so ground for kootu and finished kootu first.
  4. Tempered for kootu, then prepared for mango rice. Once rice was done, kept it for cooling down.
  5. Ground for masala vada and chopped onion and other required items, mixed and kept ready for making vada.
  6. Mixed the rice, kept aside and prepared masala vada lastly hot. Same oil, I fried some colourful star fryums.


I made dal and baby corn bajji for Aj who wont touch all the above items. But it was simple and easy to make.
Have a great weekend! Happy

Kamis, 26 Maret 2015

Paneer Quesadilla in griller

quesadilla-using-grillerMore than posting a paneer quesadilla recipe, here I am excited to post this idea of using the griller plate of the sandwich maker for making this quesadilla. I have posted chocolated sandwich using this griller plate before, after that, I tried making hara bhara kabab in this, but the heat was not just enough for kababs. After that, this is one successful use of the griller plate in the sandwich maker. This idea is again from my friend Sangeeta, she have asked me to try this as she makes this very often. This is just an idea, so use your imagination for making any quesadilla with leftover dry sabji, leftover chapati with some grated mozarella cheese. So great way to use up the leftover rotis. If you have leftover roti, make some stuffing and do this, if you have some sabji make roti and use it up in this as a snack for your hungry family who comes hungry to home. You can also use store bought wheat tortillas to make it easy. You can also make Kathi roll, the same way. Just roll your favorite and grill in between the plates. Genius right? Thanks to Sangeetha. You can make the same in waffle maker plates too.
quesadilla-in-griller


Paneer quesadilla recipe

Recipe Cuisine: Indian  |  Recipe Category: Snack
Prep Time:10 mins     |  Cook time: 15 mins     Serves: 3

Ingredients


Tortillas / chapati -  6

Paneer cubes – 1 & 1/2 cup

Onion – 1

Capsicum – 1

Red chilli powder – 1 tsp

Chaat masala – 1 tsp

Lettuce (Optional) – few

Tomato sauce – As needed

Mozarella cheese, grated – 1/2 cup

Salt - as needed

Oil – 2 tsp

Method

  1. Thaw paneer, soak in hot water and drain, crumble it roughly. Heat kadai with oil and fry onion and capsicum for a minute. Add crumbled paneer, red chilli powder, chaat masala and salt (Chaat masala has salt so add less). 1-stuffing
  2. Mix in medium flame. Keep a side. Heat the sandwich maker with griller plate. In a chapati place a leaf of lettuce, spread a tblsp of sauce. 2-ready
  3. Spread the paneer filling, 2 tblsp of  mozarella cheese and cover up with another chapati. If your chapati is big, you can just use one and fold it into half.3-spread 
  4. Place it in the hot grill and close. Grill for 4 mins or until golden lines appear. Slightly rotate the quesadilla and grill again for 2 mins. 4-grill
  5. Cut into quarters to serve.5-ready

Notes

    • Make sure the chapati is thick enough.
    • Lettuce is optional. And you can use any tomato based sauce to suit your taste.
    • Use only cheese like mozzarella which doesn't melt and flow much. Also never use too much cheese as it will ooze out.

Serve hot with any cheesy dip or tomato sauce. Check out my rajma quesadilla too.
paneer-quesadilla

Rabu, 25 Maret 2015

Carrot kosambari recipe | Ram navami recipes

carrot-kosambari-recipeRama navami 2015 this year is on 28th March (Saturday). We usually make only Panakam and payasam. Neer mor or Kosambari also is offered to Lord Rama. My favorite is Panagam. Mom makes it everytime it tastes divinely. Its perfect drink for summer too. Even if you don’t have the formality of this function, do make Panakam and neer mor, to keep yourself cool.
When I went to Chennai in Jan, my MIL made this, but sans paasi paruppu. My co-sis is a great fan of this. My mom makes carrot thayir pachadi. But this way I had for the first time and liked it too. Carrot is least favourite for me, mom and dad used to grate carrot, mix with sugar and ask us to eat and I used to cry while eating thatLoser. But when I made this salad today, I liked it, I ate the whole thing I made while I was cooking.
kosambari-rama-navami

Carrot kosambari recipe

Recipe Cuisine: Indian  |  Recipe Category: Salad
Prep Time:10 mins     |  Cook time: 2 mins     Serves: 2

Ingredients


Grated carrot – 1 cup

Moong dal/ Paasi paruppu – 3 tblsp

Lemon – 1

Salt – 2 generous pinches

To temper

Oil – 1 tsp

Mustard – 3/4 tsp

Green chilli – 1, chopped

Asafoetida – A pinch

Method

  1. Soak moong dal for an hour. Drain water completely.
  2. 1-soak
  3. In a mixing bow, place grated carrot, drained moong dal. Squeeze the lemon in it.
  4. 2-mix
  5. Temper with the items under ‘To temper’ table. Add it to the salad, add salt and mix with a fork/ spoon.
  6. 3-temper

Notes

    • You can increase or decrease the moong dal in it.
    • Same way, you can use finely chopped cucumber in place of grated carrot.
    • Lemon and salt can be adjusted as per your taste preference.

This can be kept in the full meals as a salad. Also this is offered as prasadam for Rama Navami.
kosambari-recipe

Selasa, 24 Maret 2015

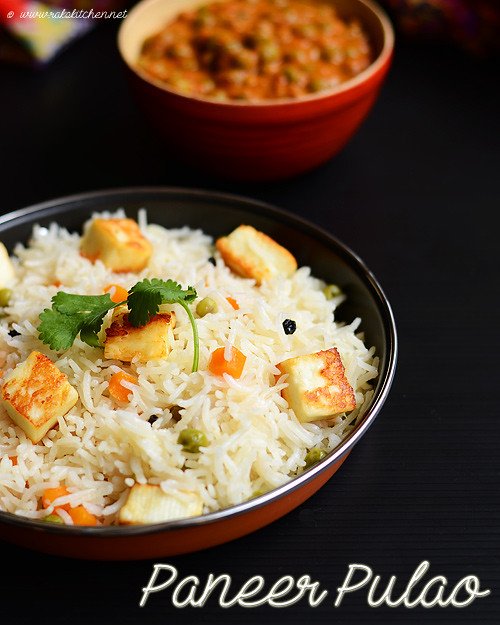
Paneer pulao recipe | Paneer pulao

paneer-pulao-recipe
I know I am going to post paneer pulao one day or the other. I rarely make this. Once I tried a version in which I cook paneer together, but ended up in rubbery paneer. It will be soft until its cools down. But later gets rubbery. I add in biryani and love it a lot. Wanted to try pulao with golden fried paneer. Today I thought since Aj at home for lunch and tried, he loved it. I have got many requests to post this and I could see many of my readers search for this particular recipe. So its high time I post this one. Its very easy and simple just similar to veg pulao but add paneer towards the end. Mild pulao, so pair it with a rich or spicy gravy as we did.
paneer-pulao


Paneer pulao recipe

Recipe Cuisine: Indian  |  Recipe Category: Lunch
Prep Time:30 mins soaking time    |  Cook time: 25 mins     Serves: 2

Ingredients


Basmati rice – 1 cup

Paneer cubes – 1  & 1/2 cups

Peas & carrot – 1/2 cup

Onion – 1

Green chilli – 2

Ginger garlic paste – 1 tsp

Coriander leaves, chopped – as needed

Salt – As needed

Ghee – 1 tsp

To temper

Oil – 1 tblsp

Cloves – 1

Cinnamon – 1 inch piece

Cardamom – 1

Black pepper – 1tsp

Shah jeera (optional) – 1 tsp

Method

  1. Wash and soak rice for 10 mins. In a pan, add ghee, add well drained soaked rice and fry until it becomes dry.
  2. 1-soak
  3. In a small pressure cooker, add oil, temper with the items given under ‘To temper’ table, in order.Add onion, green chilli and fry till onion is just transparent, without changing its colour.
  4. 3-temper
  5. Add ginger garlic paste, give it a fry and then add the veggies (I forgot and added along the veggies). Fry till veggies are half done.
  6. 4-vegges
  7. Add 1 & 3/4 cup water, required salt and bring to boil. Add the roasted rice. Bring to boil, cover with the lid and cook in medium flame for 2 whistles. I just simmer for 12 – 13 mins as my flame can be put to minimum heat.
  8. 5-add-rice
  9. Mean while you can prepare the paneer cubes. Let the paneer cubes be tiny for better taste. Toast the paneer cubes (thawed or soaked in hot water previously) preferably in a non-stick pan until golden. Do it in medium flame. You can deep fry too. Keep aside soaked in hot water until use.
  10. 2-roast
  11. Once the pulao is done, drain the paneer and add it to the pulao. Make sure water is completely drained from the paneer before adding.
  12. 6-ready

Notes

    • You can soak the rice upto 30 mins. While roasting, be gentle otherwise it may break. Also when it starts sticking to the pan, add ghee or stop roasting if its dry to avoid breaking.
    • Roasting ensures separate grains. But it needs bit more water for getting cooked than usual. I usually add less than this water, but for this recipe, add as mentioned.
    • When I shallow fried paneer, the oil spluttered a lot, so make sure you use non stick pan and use less oil. Also cook in medium flame for golden colour.
    • The pulao is very mild, so add green chillies and pepper.
    • You can add ghee fried cashews along with paneer. Also if you like sweet touch, add ried grapes fried in ghee.
    • Soaking the paneer in hot water ensures its softness even when cooled down. If you are serving immediately, you can add as such skipping soaking paneer.

Garnish with coriander leaves and serve with a spicy or rich accompaniment. We had with peas masala and it was perfect!
paneer-pulao-rakskitchen

Kamis, 19 Maret 2015

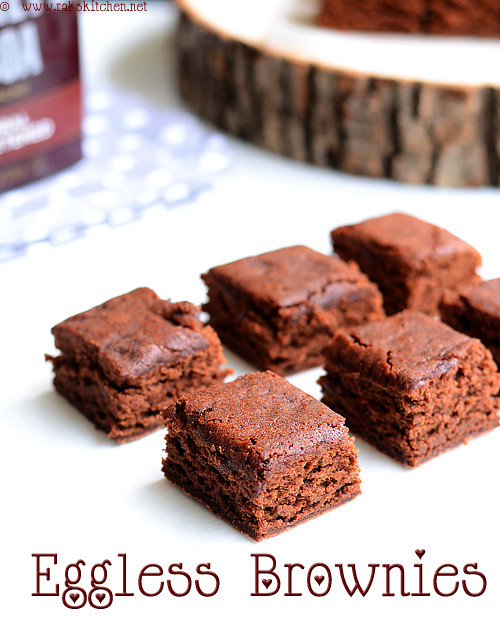
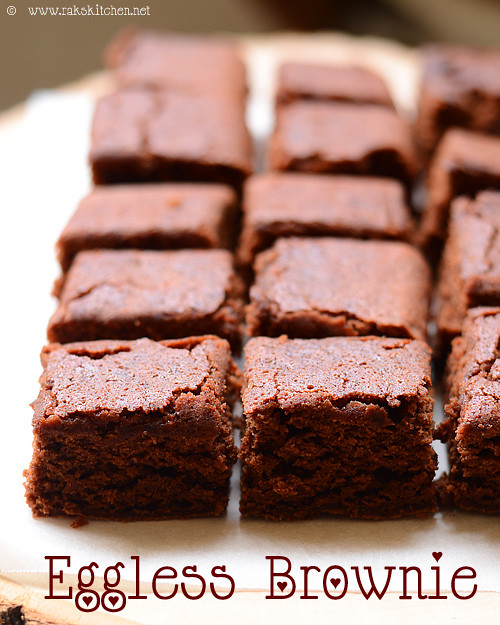
Eggless Brownie recipe | Eggless brownies

eggless-brownie-recipe My old post yoghurt brownies was the one and only attempt I have made to post an eggless brownies in my blog. Other than that, though I have tried one or two for visiting relatives, I have not attempted to post one. I dont bake mostly to avoid my intake of sugar, all purpose flour. If I in case crave for brownies, famous amous is always there and I can buy 2 or three and indulge. Its better than baking and end up eating the whole thing. Yeah no one eats baked goodies here at home. But Aj was asking me if I could bake an eggless brownie for his last day class party for past one month. He wanted to tell his friends and teachers about my blog and with something for them to taste as well. So it seems they planned for this and told me a month ahead and kept on check with me when I should shop ingredients and when I should bake…almost 5 days a week since then. Yeah, over excited boy! That Aj Tongue!!. So I chose this eggless brownie from Gayathris cookspot, where there is a lot of great baking recipes. I halved the recipe and made in few batches (as I had small baking pan). It came out really good.

eggless-brownies 


Eggless brownie recipe

Recipe Cuisine: Continental  |  Recipe Category: Dessert
Prep Time:10 mins    |  Cook time: 30 mins     Makes: 16

Ingredients


All purpose flour – 1 cup + (2 tblsp & 2 tsp)

Coco powder unsweetened – 1/3 cup

Sugar – 1 cup

Instant coffee – 1/2 tsp

Baking powder – 1 & 1/4 tsp

Butter – 1/4 cup

Salt – 1/4 tsp

Method

  1. Preheat oven at 180 deg C. In a heavy bottomed pan, mix  the 2 tblps + 2 tsp flour in 1/2 cup of water. Heat it over the stove to make a thick paste. transfer it to the mixing bowl and let it cool down.
  2. 1-mix
  3. In the same pan, add butter and melt it. Switch off the flame. Add coco powder and using a whisk, make it smooth.
  4. 2-choco
  5. Add coffee (dissolved in a tsp of warm water – I added as such but it didn’t dissolve so dissolve and add), sugar to the cooled flour paste and mix well. It will turn watery.Add the coco + butter we melted to this and mix until smooth.
  6. 3-mix
  7. Add baking powder, flour,salt and mix well. The batter will be thick as shown in the next step, so dont panic.
  8. 4-mix
  9. Transfer to a greased pan (8 *8 inch square) - lined it with a greased butter paper if possible. Transfer the batter to the baking tin and bake for 23 - 25 mins at 180 deg C. Mine took 25 mins.
  10. 5-bake
  11. Once done, set aside for 10 mins and later invert it to a wire rack. Cut into squares using a knife.
  12. 6-ready

Notes

    • Note the consistency of the flour paste we prepare in step 1. If its watery, then your batter consistency also will change.
    • You can add walnuts or pecans to the batter, will be good to have the crunch. The brownie was very sweet for me and nuts will be good to balance it.
    • I used unbleached flour for a batch and it worked fine as well.
    • Baking time may vary depending on your oven. So keep an eye after 23 mins.

Have it warm heated up in microwave with ice cream, its bliss! Hope kids enjoy this. 
eggless-brownie

Rabu, 18 Maret 2015

Vendakkai Puli kulambu recipe (With coconut)

ladies-finger-kuzhambu
I first need to thank a reader who took time and sent me this recipe. I have few reader friends who send their recipes to me for trying and posting in my blog. I have many like that in my inbox folder. Last month when I could not come to a clear decision what to try, I went through this folder and saw this recipe from Sangeetha sekar which was apt for me to try for blog as well as for my lunch. She sent this long time back, its only now I got the right time. It was yummy and different from our usual way of cooking.

vendakkai-kuzhambu


Vendakkai puli kulambu recipe

Recipe Cuisine: Indian  |  Recipe Category: Lunch
Prep Time:30 mins tamarind soaking time    |  Cook time: 20 mins     Serves: 4

Ingredients


Ladies finger – 12 young, tender

Tamarind – 1 tsp tightly packed

Sambar powder – 2 tsp

Turmeric powder – 1/4 tsp

Sesame oil / Oil – 2 tbslp

Salt – As needed

Garlic – 3 flakes

To sautee in oil and grind

Shallots (Small onion) – 12

Tomato – 2

Coconut – 1/2 cup

To temper

Oil  - 2 tblsp

Mustard – 1 tsp

Fenugreek seeds / Vendhayam / Methi – 1/2 tsp

Curry leaves – 1 sprig

Method

  1. Cut ladies finger into one inch pieces. Peel small onion, roughly cube tomato, slice garlic into thin circles. Soak tamarind in 1/2 cup hot water for 30 mins, extract the juice with another 1/2 cup of water. Keep aside. In a kadai, add a tblsp of sesame oil and fry the ladies finger in medium flame stirring every now and then until the slime goes away and black spots appear here and there. Keep aside. In the same kadai, fry peeled small onion. Add oil if needed.
  2. 1-fry
  3. Once onion turns transparent, add cubed tomato.
  4. 2-fry
  5. Once tomato becomes soft, add coconut and fry for a minute. Transfer to a plate.Let it cool down.
  6. 3-roast
  7. Mean while, Heat oil for tempering, temper with the items given under ‘To temper’ table, add sliced garlic. When garlic is fragrant, add the sauteed ladies finger.
  8. 4-temper
  9. Add extracted tamarind juice, and adjust water so that totally its 2 & 1/2 cups of water. Add turmeric, sambar powder and mix well. Simmer for 8 mins.
  10. 5-add
  11. Meanwhile grind the sauteed onion, tomato, coconut with little water to a paste. Add it to the boiling gravy along with little water.
  12. 6-ground
  13. Boil for 3 more minutes and until the gravy is thick. It thickens a bit after cooling down, so switch off accordingly.
  14. 7-boil

Notes

    • Since we add tomato as well as tamarind, add sambar powder or red chilli powder as mentioned, otherwise it will not be balanced since we are adding coconut too.
    • If you don’t have sambar powder, just replace with red chilli powder as the original recipe calls for.

Serve with rice and if desired, sesame oil or ghee on top.


Blogger news

Blogroll

About