Pages

Diberdayakan oleh Blogger.

Arsip Blog

Kamis, 29 Mei 2014

Methi dal recipe | Methi dal with moong dal

methi-dal-recipe-1
I got a bunch of methi leaves in Mustafa last week when I went for monthly grocery purchase. With only 2 weeks to go to Chennai, when I was picking all the veggies, Vj reminded me there is only 2 weeks and as Aj too planned to travel alone prior to us, he told to buy accordingly. But since its 2 weeks, I had to buy as the vegetables as usual. I saw the methi leaves fresh and so bought and kept. I usually clean and freeze the leaves and use it for making methi thepla. I just love it a lot. Other than methi thepla, I rarely make aloo methi. Otherwise, I do not use methi in anything else. My MIL makes kootu with this as we call it vendhaya keerai kootu. But I have not tried that. I tried making methi pulao, which I will schedule next month before going to Chennai. I had half the methi leaves remaining, so I tried making this methi dal. It was really falvorful, I love all kind of dals, so loved this as well. It goes well with both rice and roti.
methi-dal-recipe

Methi dal recipe

Recipe Cuisine: Indian  |  Recipe Category: Side dish
Prep Time: 15 mins    |  Cook time: 20 mins    Serves: 3

Ingredients


Moong dal / Paasi paruppu  1/2 cup 
Methi leaves  3/4 cup 
Onion  1 
Tomato  2 
Green chilli  2 
Garam masala powder  1/2 tsp 
Turmeric  1/4 tsp 
Red chilli powder  1 tsp 
Ginger garlic paste   1 tsp 
Salt  As needed 


To temper

Ghee 1 tblsp
Jeera / Cumin seeds 2 tsp


Method

  1. Pressure cook dal with enough water for 3 whistles. Chop onion and tomatoes finely, slit the green chillies. Clean the leaves and keep it ready.
  2. Heat a kadai with ghee and add cumin seeds in low flame. Add onion and fry till transparent. Add green chilli (I didnt add), ginger garlic paste and fry for a minute in medium flame.
  3. 1-temper
  4. Add tomatoes, salt, turmeric, red chilli powder, garam masala powder and fry until tomatoes turn soft.
  5. 2-onion-tomato
  6. Add washed methi leaves and fry till its reduced in volume.
  7. 3-add-methi
  8. Add cooked dal, enough water (I added 1 & 3/4 cups) and let it boil for 2 minutes.
  9. 4-add-dal
  10. Let it be in low flame for 5 minutes or until the desired consistency reaches also the methi leaves gets cooked.
  11. 5-boil

Notes

    • Chopping the methi leaves or adding as such is your choice.
    • You can add either finely chopped ginger or garlic alone instead of ginger garlic paste.
    • If adding ginger, adding asafoetida will enhance the taste.
    • Add enough tomatoes for tanginess to supress the bitterness of the methi leaves.
    • You can add 1/2 tsp of Amchoor powder if you are short of tomatoes.
    • If the tanginess and spice level is not balanced then it may taste bitter.

Serve with hot steamed rice or soft phulkas!  Check out the dal tadka and dal fry recipe too...

methi-dal

Selasa, 27 Mei 2014

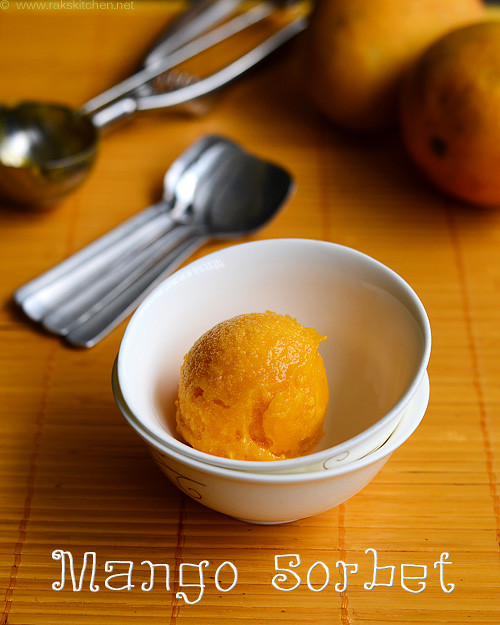
Mango sorbet recipe | Mango recipes

mango-sorbet
Mango sorbet is a must try for mango lovers this mango season! This is so simple, easy with only 3 main ingredients – Mango, sugar and lemon. And it gives full satisfaction for mango lovers. Plus a treat for this summer. I made this for the second time after I loved it when I made it for the magazine. Since I loved it, I decided to post it here. Without any blah blahs, here is the recipe.
mango-sorbet-recipe

Mango Sorbet recipe

Recipe Cuisine: Indian  |  Recipe Category: Breakfast
Prep Time: 5 mins+ 10 hours freezing time     |  Cook time: 5 mins    Serves: 3

Ingredients


Mango pulp  1 cup 
Sugar  1/2 cup 
Water  1/2 cup 
Lemon juice  1 tblsp 

Method

  1. Slice the mangoes along the sides and scoop out the pulp using a spoon. Scrap the pulp from the seed as well and collect 1 cup of pulp. Place it in a blender, puree it first.1-scoop
  2. Make a simple sugar syrup by heating sugar and water and just bring to boil to dissolve the sugar completely. Cool down and blend it with the mango pulp, lemon juice.2-sugar
  3. Transfer to a freezer safe airtight container and freeze it for an hour. 3-freeze
  4. Take it out, mix it until smooth, with a fork. (For smoothest texture of all, you can grind the sorbet in mixie instead of mixing with fork).Repeat the same every half hour for 5 more times. Then freeze for 6 to 12 hours depending on your freezer temperature and conditions. Scoop and serve.4-scoop

Notes

    • If you have icecream maker, you can churn the sorbet as per the instructions. This will give you the best result of all - Smoothest sorbet, equal to icecream's texture.
    • I used alphonso mangoes for vibrant yellow coloured result.
    • Lemon juice not only adds a tangy taste, but also must be helping in its texture. So do not omit.
    • MIxing with fork every half hour for 5-6 times helps in smooth texture.

Freeze the serving bowls too for an hour before serving and scoop the sorbet to serve it.

homemade-mango-sorbet

Sabtu, 24 Mei 2014

Vaangi bhaat, Lemon rice, Curd rice - Lunch menu 39

Vaangi bhaat lemon rice curd rice

I had only very few brinjals leftover after I made the brinjal curry (with garlic) last week and I was really bored of my usual cooking – sambar – poriyal, etc; etc;Doh. And I ran out of the regular eating rice too. I was thinking what to make and suddenly thought of making vaangi bhaat. I didnt want to waste those brinjals or make sambar with it. And was worried if Vj would eat or not. So I added on the lemon rice to the menu. I had very little regular eating rice, so made curd rice with it. But to my surprise, Vj loved the brinjal rice more than lemon rice, coz it turned out super delicious and spicy. Needless to say, I love, loved the whole meals. I always love variety rice over the regular sambar sadam. Its easy to cook and break from the routine cooking too. Let me write how I prepared this lunch menu.

Lunch menu 39 – Vaangi bhaat, Lemon Rice, Curd rice

Recipe Cuisine: Indian   |  Recipe Category: Lunch
Prep Time: 30 mins     |  Cook time: 1 Hr   Serves: 3
  1. I used India gate aged rice. It gives longest grain and flavorful too. I soaked it for an hour in warm water. Cooked it in electric rice cooker.
  2. Pressure cook the regular rice for curd rice, cool down that as well. I used half the basmati rice for vaangi bath and half for lemon rice.
  3. Grate coconut. Keep all the ingredients required for everything, like curry leaves, coriander leaves, green chillies, cut brinjal and keep immersed in water.
  4. Roast for vaangi bhaat. Cool down.
  5. Temper for curd rice, transfer to a container in which you are going to mix it. Temper for lemon rice and transfer to another bowl in which you are going to mix lemon rice. Lastly temper for vaangi bath.
  6. Grind the vaangi bath masala powder and finish preparing the masala.
  7. By now both rice would have been done, cool down and carefully separate the grains and mash the rice for curd rice.
  8. Mix vaangi bath first, then mix lemon rice and lastly curd rice.
  9. Finally fry some vadams or fryums or appalams.

Here is the lunch with vaangi bhaat, lemon rice,curd rice, fryums and pickle.

vaangi bath lemon rice curd rice

Check out the recipes
  1. Vaangi Bhaat recipe
  2. Lemon rice recipe
  3. Curd rice recipe
  4. Koozh Vadam recipe
  5. Pickle recipes
Have a great weekend!Happy

Kamis, 22 Mei 2014

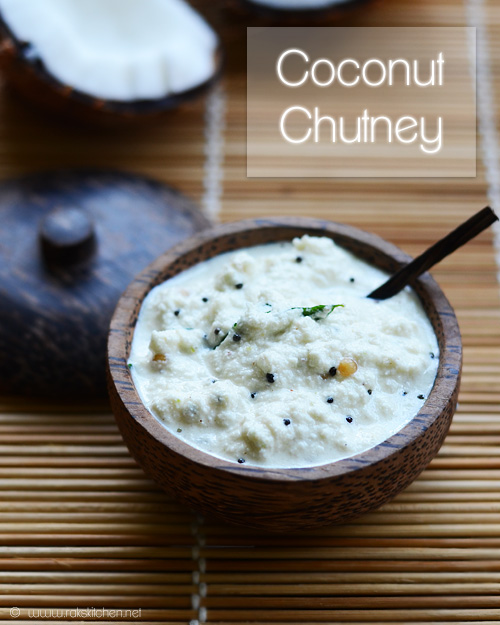
COCONUT CHUTNEY | COCONUT CHUTNEY RECIPE


coconut chuteny recipe
‘Coconut chutney’ is a very easy and common side dish made in South Indian households. Though mainly for idli and dosa, its also best for pongal, vadai, upma etc. I have been thinking how to post this basic and simple recipe here. But many of the readers who are beginners/ new to cooking ask me how to make coconut chutney. So I think its high time to post this one here. I think the recipe is so simple and easy that can be made in a jiffy, there are lots and lots of variations that can be done with this basic recipe. So the notes will be longer than the recipe. Tongue Also few tips and tricks for making perfect tasty chutney.
thengai-chutney-recipe

Coconut chutney recipe

Recipe Cuisine: Indian  |  Recipe Category: Side dish
Prep Time: 10 mins    |  Cook time: 2 mins    Serves: 3

Ingredients


Grated coconut  1/2 cup 
Fried gram dal (pottukadalai)  2 tblsp 
Green chillies  2 
Salt & Water  As needed 

To temper

Oil 1 tsp
Mustard 3/4 tsp
Urad dal 1 tsp
Curry leaves 1 sprig


Method

  1. Grate coconut, place it along with chilli, fried gram dal, salt and little water in a blender to grind it until smooth or desired consistency.1-how-to-make-chutney

Notes

  • Always use freshly broken and scrapped coconut for best tasting chutney. Dont use dried up coconut.
  • If the coconut is little bit on the tender side, then it will taste great.
  • How to troubleshoot  a watery chutney? – Add more grated coconut or little more fried gram dal and grind it again. Adjust salt and chilli accordingly.
  • My chutney is not white, why? – Do not scrap the coconut with the brown part, scrap carefully only the white part. Do not add more fried gram dal or chilli, which will also affect the colour.
  • Fresh and a bit tender coconut gives whitish chutney.
  • Add little milk for getting a rich and whiter chutney.
  • Add water carefully while grinding, you can add less while grinding and always can add more if needed later.
  • If you want chutney in runny side, add little more fried gram dal and grind it watery. If you want thick, then no need.
  • I sometimes never add fried gram dal also and grind with very less milk or water to make ‘getti chutney’.
  • Add a few drops of coconut oil and mix after grinding for a nice flavor or you can use coconut oil for tempering too.
  • Variations with this chutney : 
    * Add a small pinch of tamarind (Add more chilli to balance)
    *Add a garlic flake while grinding
    *Add a piece of ginger while grinding
    *Add a small onion (Shallots) while grinding
    *Add few curry leaves while grinding
    *Add a half sauteed tomato while grinding (Add more chilli to balance)
    *Add half sauteed onion while grinding
    *Add roasted channa dal in place of fried gram dal
    *Add roasted channa dal and red chillies in place of fried gram dal and green chillies.
    *Add roasted peanuts and red chillies in place of fried gram dal and red chillies.
    *Temper 2 tblsp finely chopped small onions
    *Fry some carrot and grind along to make carrot chutney
  • Do not use your hands while grinding if you are packing it and makes sure you temper the chutney as my mom / MIL says it keeps the chutney longer without getting spoilt.

That’s it, you can pair it up with Idli, Dosa, Pongal, kichadi, upma, adai, vadai, rava dosa etc.

coconut-chutney-recipe

Rabu, 21 Mei 2014

POTATO PODIMAS RECIPE


I have made potato podimas only very few times as no one here likes it. But I love that name, it fascinates me every time when ever I hear ‘Podimas’Love Struck. Since I have not made this that much often, I don’t know too, how to make this. When I made last time too, it didn’t turn out good. The taste was not as my mom and MIL makes. I had no idea why. I think I mashed up the potatoes too much. So it wasn’t good. This goes well with any south Indian lunch menus. Kara kuzhambu, vathal kuzhambu, or arachuvitta sambar will go well with this potato podimas. Today when I was talking to my MIL, I asked her how to make and made it for lunch. Try this Indian way of mashed potatoesWinking.
potato-podimas

Potato Podimas recipe

Recipe Cuisine: Indian  |  Recipe Category: Lunch
Prep Time: 5 mins    |  Cook time: 20 mins    Serves: 4

Ingredients


Potatoes, large  2 
Onion  1 
Green chilli  3 
Grated coconut  1/4 cup 
Coconut oil  1 tsp 


To temper

Oil 2 tsp
Mustard 3/4 tsp
Urad dal 2 tsp
Curry leaves 1 sprig


Method

  1. Chop onion finely, chop green chilli into circles. Pressure cook halved potatoes for 3 whistles. Peel the skin and make it a crumble. Do not mash.Heat a kadai with oil and temper with the items given under ‘To temper’ table. Add onion and green chilli, fry till onion turns transparent without changing its colour. Add more oil if needed.
  2. 1-potato-podimas
  3. Add salt and give a quick stir, add the potato crumble.
  4. 2-potato-podimas
  5. Add grated coconut and give a stir to mix well. Drizzle little coconut oil if desired. 
  6. 3-potato-podimas

Notes

  • Do not mash the potatoes, just crumble it roughly.
  • You can add a tsp of lemon juice too, but we generally don’t do that.
  • Coconut oil enhances the flavor.
  • You can also add turmeric along with salt to make it yellow.

We had it for lunch with radish sambar and hot rice. Mild and flavorful!

urulaikizhangu-podimas

Senin, 19 Mei 2014

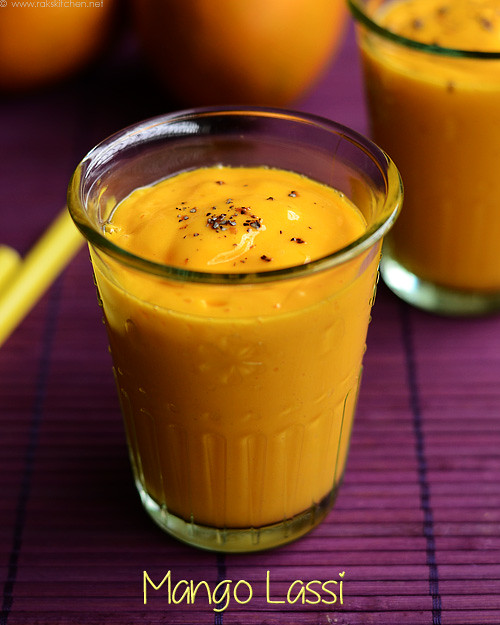
Mango lassi recipe | Mango recipes

Mango-lassi
I know this is quite simple to make, still how can I be without posting mango lassi when mangoes are in season. I just got a box of alphonso mangoes that are sweet, yellow and flavorful. So thought of making mango lassi and clicked to have mango lassi recipe here in my blog too. Nothing fancy, just make it when you have mangoes and curd. I am from the place which is famous for mangoes (Salem) but I am not a big fan of mangoes!! And trust me I have no idea why Salem is so famous for mangoes, I have not found anything special with the mangoes during my childhood. May be Salem produces lots of mangoes. Even my mom says the same. Anyways, here’s the simple mango lassi recipe and hang on for another interesting summer special recipe with mangoes.
mango lassi indian

Mango lassi recipe

Recipe Cuisine: Indian  |  Recipe Category: Drink
Prep Time: 5 mins    |  Cook time: 0 mins    Serves: 2

Ingredients


Mango pulp from 2 mangoes (I used alphonso) - 3/4 cup

Curd (plain yogurt) - 3/4 cup

Milk - 1/2 cup

Sugar - 3 tblsp

Elachi (optional) - 1


Method

  1. Wash and slice the mangoes along the sides of the seed. Scoop the pulp with a spoon and collect 3/4 cup. Place it in blender with curd, milk,(both cold)  sugar and elachi(if desired). Blend until smooth and  serve immediately. You can add few icecubes if you want it super cold.1-mango-lassi

Notes

    • I used thick fresh curd so I used milk for making it in right consistency. So adjust milk quantity according to the thickness you want.
    • Also adjust sugar as per you choice and mangoes sweetness.
    • Do not let it stand out for long time, consume immediately as we are using milk. 

Yummy, thick, rich, filling mango lassi is perfect as drink for this hot summer!
 mango-lassi-recipe

Minggu, 18 Mei 2014

Sprouts fried rice, Gobi 65, Aloo bhindi gravy - Lunch menu 38

Sprouts fried rice recipe, aloo bhindi recipe, gobi 65 recipe

This lunch menu needs some preplanning as we need sprouts for the fried rice. I planned this menu two weeks back itself, when I planned for my last week’s lunch menu with rajma masala. Yes, I soaked rajma and the green gram together as I always forget to soak, I wanted to make it together. I sprouted the green moong then in the following days. You can also use readymade sprouts if you want, but sprouting at home is more hygenic and easy too. Just soak overnight, next day, drain water and keep sprinkling water for a day as such in the container with the green moong, it will start sprouting. No need to hang it in muslin cloth and complicate, it sprouts in the bowl itself. Only thing we need to take care is sprinkle water few hours once to make sure it doesnt get dry. You can also refrigerate, it will continue sprouting, so make sure you use it within a day or two. Otherwise, if you want to store for long time, transfer to a ziploc and freeze it.
I really had no idea what to make as side dish as I am bored of manchurian side dishes, so made use of the veggies I had in the fridge and made what ever possible. Both side dishes are Aj’s favorite. Here’s how I made this lunch (considering you have already sprouts for

Sprouts fried rice, Aloo Bhindi, gobi 65

Recipe Cuisine: Indian   |  Recipe Category: Lunch
Prep Time: 30 mins (excluding sprouts preparation)     |  Cook time: 1 Hr    Serves: 3
  1. Soak basmati rice in warm water. Let water is kept for boiling to blanch the cauliflower, mean while which you can cut it.
  2. Blanch, cool and marinate for gobi 65 first and keep refrigerated.
  3. Next clean the ladies finger, cut and let it simmer in a frying pan (with oil). Meanwhile which you can cut potatoes (I cubed this time).
  4. When ladies finger is done, fry potatoes same way simmered in the pan and mean while which you can chop for grinding the gravy for aloo bhindi.
  5. Keep rice in cooker in between and pressure cook with 1 : 1/2 cups water for 3 whistles in medium flame.
  6. Prepare the gravy and let it be simmered while you cut the needed for fried rice.
  7. Gravy should be done, keep aside. Once rice is done, prepare the fried rice(cool rice before tossing the fried rice).
  8. Lastly fry the gobi 65 in batches and enjoy the lunch hot!

This lunch menu has Sprouts fried rice, aloo bhindi masala gravy and gobi 65.

Sprouts fried rice, aloo bhindi, gobi 65

Check out the links for the recipes with step by step pictures
  1. Sprouts fried rice recipe
  2. Aloo bhindi masala gravy recipe
  3. Gobi 65 recipe
You can also make any manchurian side dishes like
Check out the other fried rice recipes too

Jumat, 16 Mei 2014

PANEER RECIPES | INDIAN PANEER RECIPES

Paneer recipes from Rak’s kitchen


Recipe Cuisine: Indian  |  Recipe Category: Side dish  Prep Time: 30 mins    |  Cook time: 30 mins    Serves: 4  (Varies from recipe to recipe) 

Kadai paneer recipe  Paneer butter masala recipe  Palak paneer recipeShahi paneer recipe  Mutter paneer recipe  paneer pasanda recipe Paneer bhurji recipe  Chilli paneer gravy recipe  Paneer jalfrezi recipeChilli paneer dry recipe  Subz kurma recipe  Paneer paratha recipe Paneer fried rice recipe  Paneer masala dosa  Paneer pakora recipePaneer tikka in oven  Paneer tikka pizza recipe  Home made paneer
Technorati Tags: ,,,,,,,,,
 

Blogger news

Blogroll

About