Pages

Diberdayakan oleh Blogger.

Kamis, 10 Juli 2014

Blueberry pancakes | Blueberry pancake recipe

blue-berry-pancake1

I made this one for Thozhi Magazine's step by step series. Yes! my step by step pictures and recipes are getting published in Thozhi magazine monthly. Though I do not post all the recipes here, I loved to have this one in my blog here as this is a simple and tasty pancake recipe. This is just adding blueberries to the regular pancake batter. Perfect for kids and adults. I am sure this recipe would help all those who hate pancakes just for the sake that it is too eggy for them, coz this is eggless!! :)

blueberry-pancake-3

Blueberry  Pancakes recipe


Recipe Cuisine: Oriental  |  Recipe Category: Breakfast
Prep Time: 10 mins    |  Cook time: 15 mins    Makes: 6

Ingredients

All purpose flour/ plain flour - 1 cup

Fresh blueberries - 3/4 cup

Milk - 1 cup

Sugar - 1 tblsp

Salt - 1/2 tsp

Butter - 1 tblsp

Baking powder - 1 tblsp

Butter and honey - For topping


Method

  1. Place the dry ingredients in a bowl. Mix well with whisk, you can also sift.
  2. 1-dry-ingredients
  3. Add the wet ingredients - melted butter, milk and mix until smooth and no lumps are there. The consistency should be like idli dosa batter.
  4. 2-mix-wet
  5. Add blueberries and mix gently. Keep aside for 10 minutes.3-add-blueberry
  6. After ten minutes, heat an iron skillet preferably for even cooking and heating and switch off the stove and leave it for 5 minutes. Again switch on the flame and put it in medium flame. Grease with butter and pour one big ladle full of batter carefully. Do not spread. 
  7. 4-pour-on-tawa
  8. Wait until bubbles pop over the pancakes and the colour changes and flip carefully. Cook the other side for a minute and transfer to serving plate.5-cooked
Notes
  • Iron skillet (Iron dosa pan) works best to get golden brown colour and even cooking.
  • If you want you can cover and cook after flipping, this makes it even more soft and locks the moisture.
  • If you heat the pan really hot and make the pancake immediately, the pancakes turn dark brown in colour. That’s why I have heated the pan and switched off for a while to bring the temperature medium. ( I saw this in a video in you tube)
  • If the pan is too hot, the pancakes will have edges like flower. that is it wont be a perfect circle. So make sure to keep the heat medium.
  • Use a big ladle, so that for all the pancakes, you use only one and so all of them would be on same size.
  • You can use whole wheat flour as well, but experiment with the milk volume as it may take more.
  • You can add cinnamon or vanilla essence to make it more flavorful.
  • You can make this same with non diary milk and make it vegan.

You can stack and keep them to keep it hot and the topping can be honey or butter depends on you taste :)

blueberry-pancake-2

Selasa, 08 Juli 2014

Indian style veg sunny side up in capsicum

vegetarian-sunny-side-up-in
Ever since Sowmya (a reader, who is a great photographer) asked me to come up with a vegetarian version by sending the sunny side up in these colourful capsicums, I really wanted to make something and post. But never dared to try. Now a month back, I tried besan cheela within these and it tasted awesome. But I wanted to replicate the looks of sunny side up in the colourful capsicums. So came up with this idea. It may not be great idea , but I am happy for trying :) If you have tri coloured capsicums, you can make these for your kids as snack. You can also try the besan flour version. I closed and cooked these so, it got fried downside and got steamed on the upper side. If you want, you can flip, but I wanted the batter to maintain its white colour, so I covered and cooked.
masala-dosa-in-capsicum

Vegetarian sunny side up in capsicum recipe

Recipe Cuisine: Indian  |  Recipe Category: Breakfast
Prep Time: 15 mins excluding batter prep    |  Cook time: 5 mins   per batch Serves: 3

Ingredients


Tri coloured capsicum  1 in each colour 
Idli dosa batter  2 cups 
Potato masala  3/4 cup 
Coriander leaves  as need for garnish 
Oil  As needed

Method

  1. Slice the capsicum carefully without breaking. Use big and sharp knife. Let it be thick enough to hold the batter.
  2. 1-capsicum
  3. Heat a tawa and smear with some oil. Arrange the capsicums. Pour the batter into each carefully.
  4. 2-arrange
  5. Let the flame be in low. Spoon the masala in the centre of each, make sure you do not disturb the white part/ shape.
  6. 3-masala
  7. Cook covered in low flame, add more oil if needed and check if its done by inserting tooth pick or knife carefully and use a spatula to take it out. Flip if desired.
  8. 4-cook

notes

    • Make sure flame is the lowest to ensure cooking.
    • Do not cut the capsicum too thick as you  may end up using more batter, then getting cooked will be a problem.
    • If flipping, no need to cook covered.

Serve hot with chutney and sambar. I served with sambar alone. It was good like a steamed masala dosa. You can make this carrot chutney as side dish to make it more colourful.
indian-style-veg-sunny-side up

Selasa, 01 Juli 2014

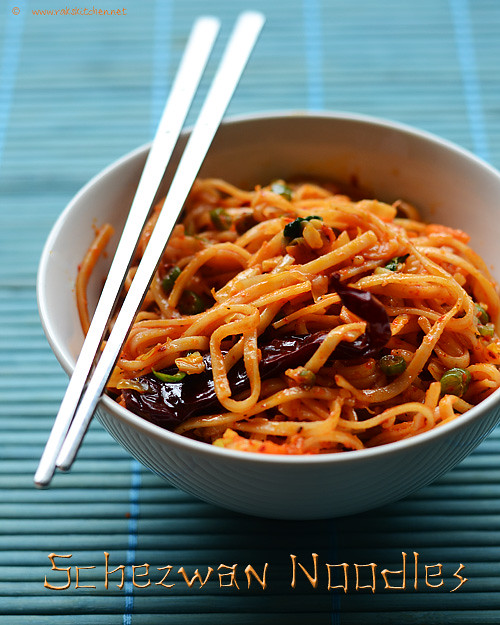
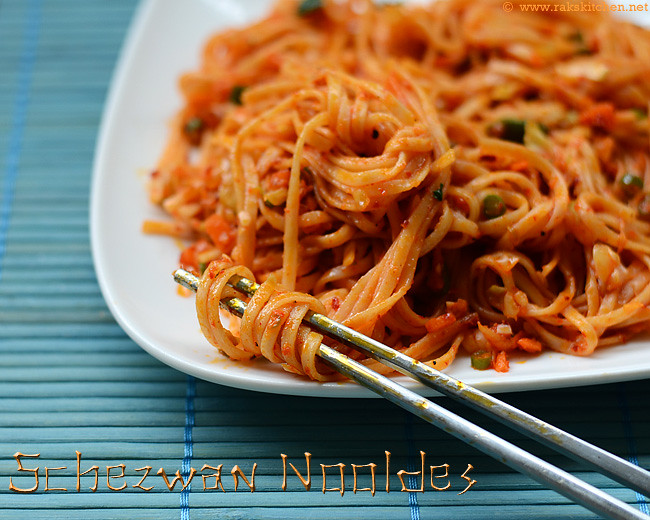
Schezwan noodles | Shezwan noodles recipe

schezwan-noodlesI now a days prefer schezwan recipes when it comes to Chinese cuisine. Fried rice and hakka noodles became very usual and all I need is some spicy stuff, so I prefer schezwan fried rice or noodles these days. Love the spiciness, garlic flavor and the fiery red hot colour too. I made some schezwan fried rice, had the chilli paste, so wanted to try noodles as well. I loved the noodles more than the rice. I assure about the taste, though the method may not be the same as it is supposed to be made.  
schezwan-noodles-spicy

Schezwan noodles recipe

Recipe Cuisine: Oriental  |  Recipe Category: Dinner
Prep Time: 15 mins    |  Cook time: 15 mins    Serves: 2

Ingredients


Plain noodles  A small bunch* 
Soya sauce  1 tsp 
Chilli sauce  1 tsp 
Black pepper powder  1/2 tsp 
Cabbage, finely chopped  1/2 cup 
Carrot  1 small, finely chopped/ julienne 
Baby beans/ beans  10, finely chopped 
Garlic, finely chopped  3 tblsp 
Dry red chilli**  1 + 8 
Spring onion (optional)  To garnish 
Sugar  3/4 tsp 
Olive oil/ sesame oil  4 tblsp 
Salt & water  As needed 

*Say roughly 1 inch diameter.
**Kashmiri red chillies - they are long and red, skin looks shrunken

Method

  1. Boil enough water and cook the noodles as per the package instructions. It hardly takes 4-5 minutes after you add the noodles to the boiling water. Drain and wash immediately to prevent sticking to each other.
  2. 1-cook
  3. Soak red chillies in hot water for 30 minutes or boil water and add the chillies, cook for 5 minutes. Cool down and grind to a paste. Make sure to grind properly.
  4. Finely chop all the required garlic, vegetables and keep all the other ingredients ready.Heat a kadai with enough oil, add a red chilli followed by the chopped garlic. Fry just for a minute,taking care, not to change its colour.Do not over fry. Add the chilli paste.
  5. 2-fry
  6. Give it a fry for minute over medium flame until the oil separates. Add chopped carrot and beans first, fry for 30 seconds in high flame, then lastly cabbage.
  7. 3-cook
  8. Stir fry for a minute over high flame. Add sugar, salt, chilli sauce, soya sauce, pepper powder.Stir quickly and add the cooked noodles.
  9. 4-add-noodles
  10. Mix or toss well so that everything gets mixed up evenly. Adjust salt, pepper and add oil if needed. I added chopped celery leaves towards the end. Transfer to the serving bowl.
  11. 5-ready

Notes

  • If noodles get stuck to each other before you add along with veggies, just sprinkle some water to loosen it. 
  • You can add spring onion in this recipe, finely chopped – white part after garlic, green part finally for garnish. 
  • You can add sugar as soon as you add veggies to retain its colour, taste and crunchiness. 
  • You can grind the chilli paste ahead and store in refrigerator and use it as needed (just for the sake you cannot grind too little chilli to make smooth paste). 
  •  Do not over fry garlic as it will not lend the flavor we need for this recipe. 
  • Adding lots of garlic is must for this recipe. Otherwise no flavor. 
  • Sesame oil and olive oil works best for this.

Serve hot as such or any manchurian side dish like Gobi manchurian, baby corn manchurian or veg manchurian gravy. You can also try chilli paneer dry or chilli paneer gravy as side dish.
schezwan-noodles-recipe

Rabu, 25 Juni 2014

Eggless carrot muffins recipe | Eggless baking recipes

carrot-muffins
I made these muffins a long time back, but saved for posting this time when I am on vacation as I knew I would be short of posts. I really loved the simplicity of this recipe when I saw this here in this blog. It was tasty, healthy with no maida – with carrots and wheat flour and no butter, only oil so lower in fat too. What else we need. I had these myself for snack without any guilt. You can also try this for your family for their snack and sure they are going to love this. Its been a long long time since I posted any baking recipes, so this one is perfect to break the break, stay tuned for more eggless baking recipes! I am enjoying my vacation at mom’s place and I really sorry, could not respond to the flowing mails and comments. Soon will respond to all you queries!

carrot-muffins-recipe

Eggless carrot muffins recipe

Recipe Cuisine: Continental  |  Recipe Category: Snack
Prep Time: 15 mins    |  Cook time: 18 mins    |  Makes: 8

Ingredients


Wheat flour / Atta  1 & 1/4 cup 
Curd / plain yogurt  1 cup 
Grated carrot  3/4 cup 
Sugar  3/4 cup 
Oil  1/4 cup + 2tblsp 
Baking powder  1 tsp 
Baking soda (Sodium bi carbonate)  1/2 tsp 
Vanilla essence  1/2 tsp 
Salt  A pinch 

Method

  1. Gather all the things required to the counter top. Preheat oven to 180 deg C. Mean while wash, peel and grate carrots. Keep aside. Sift flour, baking powder, baking soda and salt in a bowl. This is to ensure even mixing.
  2. 1-grate-carrots
  3. In another mixing bowl, using a whisk mix well curd and oil.
  4. 2-wet-ingredients
  5. Add sugar, vanilla and mix until it is dissolved.
  6. 3-mix-sugar
  7. Add the sifted flour mixture (dry ingredients) and mix gently. Do not over mix.
  8. 4-mix-flour
  9. Lastly add carrots and fold (mix gently) the mixture so that carrot is mixed with the batter.
  10. 5-mix-carrot
  11. Line a muffin tray with muffin liner (I use two for better looks) and pour batter until 3/4 th of it. Make sure to spoon equal amount of the batter in all the muffin liners.Bake for 15- 18  minutes or until a tooth pick inserted comes out clean. Cool over a wire rack before storing. Keeps good at room temperature for 2 days.
  12. 6-baked

Notes

  • Any cooking oil can be used, I used sunflower oil. Other than this, Canola, olive oil or vegetable oil is recommended.
  • Do not over mix after you add the dry ingredients.
  • Bake immediately once you prepare the batter.

Soft, tasty, healthy muffins, perfect for breakfast or for your kids snack box or as kids evening snack.

eggless-carrot-muffins


Selasa, 24 Juni 2014

Methi pulao recipe | Methi recipes

methi-pulao-recipe
I bought a bunch of methi leaves when I went to shop at Mustafa and it was fresh, so too hard resist buying. I was thinking what else to make other than making methi thepla. Then made pulao in my own way and turned out easy yet very flavorful and makes a perfect lunch box recipe. Since I made only for us two, I made it in my non stick kadai itself. It was perfectly done and super easy. Sure to follow this method when I make this kind of pulaos.
methi-pulao-2

Methi pulao recipe

Recipe Cuisine: Indian  |  Recipe Category: Lunch
Prep Time: 45 mins    |  Cook time: 20 mins    Serves: 2

Ingredients


Basmati rice  1 cup 
Methi leaves  1 cup  
Green chillies  2 
Red chilli powder  1 tsp 
Coriander powder  3/4 tsp 
Amchoor powder  1/2 tsp 
Salt  As needed 

To temper

Ghee 1 tblsp
Cinnamon 1 inch piece
Cloves 1
Cardamom 1
Bay leaves 1

Method

  1. Soak the rice in warm water for atleast 30 mins. Heat a pressure cooker (I did in my non stick kadai itself) and add ghee, temper with the items under ‘To temper’ table. Add the cleaned methi leaves. 1-temper 
  2. Fry in medium flame until it shrinks in volume without changing its colour. Add green chillies, red chilli powder, coriander seeds powder, amchoor powder, salt and give a quick stir.2-fry
  3. Add water(1 & 1/2 cups) and bring to boil. Add the soaked rice and bring to boil again.3-add-water 
  4. Keep the flame in lowest possible and cook covered for 10 minutes or until the water is fully dried up.4-cook
  5. Stir only once in between, carefully for even cooking.5-cooked

Notes

    • Soaking in warm water is very important as it helps the rice to get cooked in short time and also helps in giving long grain.
    • Do not stir much after the rice gets cooked, just do it on between once for even cooking.
    • If you are cooking in pressure cooker, after the water boils, close the lid and cook in lowest flame for 10 mins. Or if whistle, use 2 cups water and let 2 whistles in medium flame.
    • If you don’t have amchoor powder, use 1 tsp lemon juice in place of it.
    • Do not chop the leaves as it may turn bitter while cooking.

Serve hot with any raita or dal or any gravies. I had simply with raita and pickle. It was great and flavorful.
methi-pulao

Rabu, 18 Juni 2014

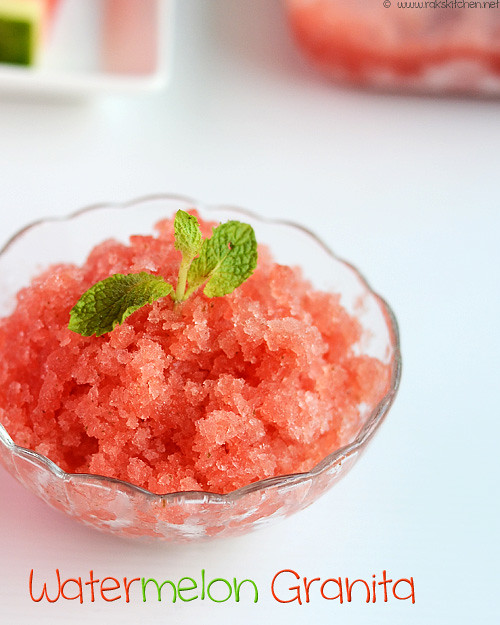
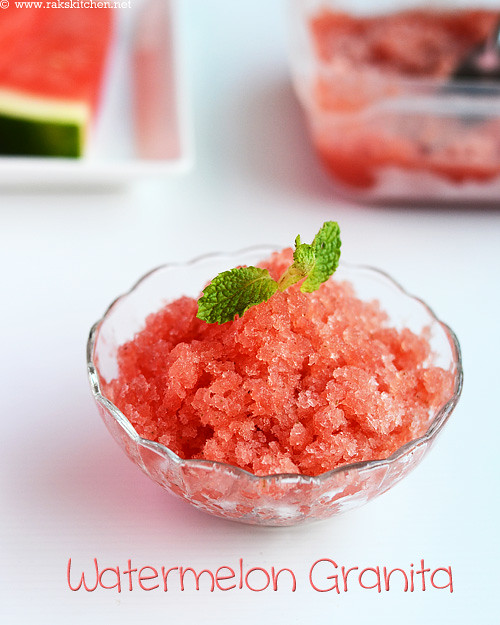
Watermelon granita recipe | Summer recipes

watermelon-granita-recipes
Another easy peasy summer treat! Big Grin  Watermelon by itself is a great thirst quencher. I wanted to make this granita for long time since I thought watermelon will be great when made as granita. And yes it was perfect when I made as granita. Its like heaven when you have it on a hot sunny day when you are thirsty and craving something cold to have. Vj and me totally loved it. Here is the simple recipe, try this and impress your family and friends. I saw this recipe idea as a Popsicle here and adapted slightly, tried as granita.
watermelon-granita-recpe

Watermelon granita recipe

Recipe Cuisine: Indian  |  Recipe Category: Dessert
Prep Time: 12 hrs    |  Cook time: 0 mins    Serves: 2

Ingredients

Watermelon chopped - 4 cups

Sugar - 1/4 cup

Mint leaves - 6

Lemon juice - 1 tblsp


Method

  1. Place everything in a blender and blend until smooth. Pour in a freezer safe broad container. Freeze for an hour and again take it out, wipe the sides inside the box especially corners, that would have started to freeze.
  2. 1-grind
  3. Repeat once again after an hour. Again freeze overnight or minimum 6 hours and use a fork to scrap the frozen mixture and serve immediately.
  4. 2-freeze

Notes

    • Do not add more mint leaves as it will over power and ruin the taste.
    • While freezing, refrain opening the freezer door often.
    • Granita is supposed to be grainy, so make sure you scrap with fork and there should not be any lumps too.

Serve as soon as you scrap as it will melt very fast, then it will loose the texture.

watermelon-granita

Selasa, 17 Juni 2014

Baingan Bharta Recipe | Baingan bharta

baingan-bharta-recipe
I made this Baingan Bharta recipe for the first time. It was in my handwritten cookbook. But was sceptical how it would be. When I tried sutta kathirikkai chutney, though I liked it, the smoky smell was very dominating. I was thinking how it would be as side dish if I make it the same way as a side dish for roti/ phulka.  So I kept postponing. Now when I was thinking what to schedule for this month when I am in India, I though I can try this and see and post if its good. And to my surprise, it was amazing! I felt why I compared the sutta kathirikkai chutney when this has loads of masalas and onion, tomatoes. It was so rich inspite of the fact, it had nothing fatty. I had a lot without any guilt Happy.
baingan-bartha


Baingan Bharta recipe

Recipe Cuisine: Indian  |  Recipe Category: Side dish
Prep Time: 20 mins    |  Cook time: 15 mins    Serves: 2

Ingredients


Aubergine/ eggplant  1
Onion  2 
Tomato  3 
Ginger garlic paste 2 tslp
Red chilli powder 2 tsp
Garam masala powder 1 & 1/2 tsp
Turmeric 1/4 tsp
Chopped coriander leaves 2 tblsp
Salt As needed


To temper

Oil 2 tblsp
Jeera 1 tsp


Method

  1. Wash, remove the stalk of the aubergine by cutting that part. Pat dry with a clean kitchen towel, apply oil all over the aubergine and cook it over medium to low direct flame. I used my paniyaram turner metal stick for this to hold it. Turn it often for even cooking. Make sure the heat is moderate so that it is not burnt outside and uncooked from inside. Cool down and peel off the skin. It comes out very easily if its cooked properly and evenly.1-raost
  2. Mash it/ tear it roughly and grind it in a mixer. Smooth or rough its up to you, but I did smoothly.2-peel,-grind
  3. Heat a kadai with oil and temper with jeera. Add finely chopped onion, fry till transparent. Add ginger garlic paste and fry for a minute.
  4. Add finely chopped tomatoes, salt, 1/2 tsp of garam masala, red chilli powder and turmeric. Fry till everything becomes mushy.4-masala
  5. Add the ground aubergine and 3/4 cup to 1 cup water and mix well. Let it boil in low flame for 5 minutes. Stir in between for even cooking.5-baingan
  6. Lastly heat 2 tsp of oil, switch off the flame, add garam masala immediately and stir it. Pour it to the gravy and mix well. Add coriander leaves lastly and mix well.6-ready 

Notes

    • Cooking the aubergine in moderate heat is very important. If the brinjal is uncooked, then it may taste bitter.
    • You have to add enough tomatoes too, otherwise bitter gravy.

While serving, you can top with chopped onions and more coriander leaves, with a squirt of lemon. Best with phulkas and rotis.
baingan-bharta
 

Blogger news

Blogroll

About