Pages

Diberdayakan oleh Blogger.

Rabu, 14 Mei 2014

EASY BANANA NUTELLA ICECREAM RECIPE

easy-nutella-icecream
This is an easy and delicious, smooth and rich icecream made with just two ingredients. Banana and nutella. And this is best easy way to save the about to spoil banana. When ever you have banana that is about to spoil, just slice it and freeze it in a ziploc, and when ever you feel like, grind it with nutella and freeze, your icecream is ready. Yes I wrote the recipe here itlself! I saw this here and  made this (and clicked) for Kungumam thozhi and really wanted to share it here too as its too good to miss it. Kids and adults at home will sure love it. After all, just 2 ingredients!
banana-nutella-icecream

Banana nutella icecream recipe

Recipe Cuisine: Continental  |  Recipe Category: Dessert
Prep Time: 14 hrs,freezing time+ 5 mins    |  Cook time: 0 min    Serves: 3 scoops

Ingredients


Banana
Nutella  3 tblsp

Method

  1. Peel and slice the bananas (roughly 1 & 1/2 cups) and freeze it in an airtight freezer safe box or in a ziplock. I used 2 dole bananas (long).
  2. 1-slice,-freeze
  3. Once completely frozen, take it out from freezer, let it be for 15 minutes and grind it with nutella until creamy.
  4. 2-grind-smooth
  5. Transfer to an airtight freezer safe box and freeze it for 4 hours before scooping and serve.
  6. 3-freeze-scoop

Notes

    • You can try the same with 5 tblsp of chocolate drink like bourvita or boost, plus 2 tblsp of cream.
    • You can add sugar if you want if the banana is less sweet.
    • Freezing time varies depending upon ur climatic conditions and ur fridge, so freeze more if needed.

Top with your favourite icecream topping like peanut crumble or walnuts and serve cold!
nutella-banana-icecream

Senin, 12 Mei 2014

MYSORE MASALA DOSA RECIPE

mysore-masala-dosa 
Mysore masala dosai is one of the things in my to try in restaurants list that I  have planned in my trip to India this holidays. I have tasted only once I think that too I could not find any difference about the regular masala dosa and that one they served. But being a food blogger and a foodie, I have heard mysore masala dosa is different form the regular masala dosa, right from the dosa to the things that go inside the dosa. Last year I saw a youtube video which shows a roadside hotel, a man making dozens of these dosas at a time. With ease, with loads of butter and we forget about everything and instantly drool if we see that video. I saw him putting a red chutney over the dosa, with generous butter topping and masalas stuffed and served. The dosa is evenly browned and crisp, dense, thick than we do at homes.
And I get few requests once in a while to post dosa batter recipe and this mysore masala dosa recipe too, especially the red chutney which makes the spicy difference in this dosa. I referred this blog for red chutney and tried, though I changed the ratios as the first time I tired it, i got too thick chutney. As I told in the dosa post, this is the main post I wanted to post, before which I posted the dosa batter recipe separately as it would help many to grind it easily in mixie.
mysore-masal-dosa

Mysore masala dosa recipe

Recipe Cuisine: Indian  |  Recipe Category: Breakfast
Prep Time: 3 hr soaking time + 12 hr fermentation     |  Cook time: 25 mins    Serves: 4

Refer this Dosa recipe for the dosa batter.

For spicy red chutney to spread over the dosa

Ingredients


Channa dal  3 tblsp 
Dry Red chilli (long variety)  7 
Garlic  5 flakes 
Shallots/ small onion  2 
Salt  As needed 

For the potato masala

Potatoes 3, big sized
Onion 1
Carrot, finely chopped (optional) 2 tbslp
Green chilli 2
Finely chopped ginger 1 tblsp
Turmeric powder 1/8 tsp
Salt as per your taste


To temper

Oil 1 tblsp
Mustard 3/4 tsp
urad dal 1 tsp
Channa dal 2 tsp
Curry leaves 1 sprig

Method

  1. Wash and cut each potato into 4 and pressure cook with 1/2 cup water for 3 whistles. Peel off the skin and mash it well. Heat a pan with oil and temper with the items given under ‘to temper’ table in order. Let the cashews turn golden.
  2. 1-potato-masala
  3. Add chopped ginger, green chilli, onion, carrot and fry well for a minute. Add 1/4 cup water and turmeric.
  4. 2-potato-masala
  5. Add the mashed potatoes and mix well. Fry for 2-3 minutes, add oil if needed more.
  6. 3-potato-masala
  7. Roast channa dal and red chillies in medium flame with few drops of oil. Add shallots, garlic along with and fry for few minutes. Cool down and transfer to the mixer.
  8. 1-mysore-masala
  9. Grind it to a thick, yet spreadable chutney, with a little water. Heat dosa pan, spread the dosa batter evenly over the hot tawa, once the dosa is half cooked, add a tblsp of this chutney.
  10. 2-mysore-masala
  11. Spread it using the back of a spoon around the dosa. Add butter if you want and spread it evenly too as it melts and you can add oil alternatively.
  12. 3-mysore-masala
  13. Add 4 tblsp of the prepared aloo masala and its your option either to spread it slightly and fold the dosa or keep the masala and roll the dosa. No need to flip the dosa.
  14. 4-mysore-masala

Notes

    • Make sure to grind the chutney spicy to make the dosa perfectly spicy. Otherwise it will be like the regular masala dosa.
    • Adding butter sure enhances the taste and browning, but make sure you restrict yourself with only one or two.
    • I made with more channa dal first time and found it less spicy and too thick, so I have adjusted the ingredients accordingly in my recipe. So you may get more deep red coloured chutney when you try.

Serve with sambar and coconut chutney the evergreen combination, if you want, with a dollop of butter.
mysore-masala-dosa-recipe

Jumat, 09 Mei 2014

Rajma chawal, kadai bhendi - Lunch menu 37

Rajma masala, chawal, kadai bhindi

Today's lunch menu is more a lunch combination idea. Aj and me just love to have basmati rice for lunch with any dal or some north Indian gravy. So I wanted to have a combo with this kadai bhindi as its been a long time I made this. Also I had this colourful capsicums little bit left over from something, so wanted to make use of it too. How much ever I had a wrong impression about rajma masala, now I am totally love it it a lot. When I made this lunch, the we really enjoyed it a lot. After I finished eating and clicking, I realized I had some dough for making phulkas and I could have included that in this menu. So feel free to include it when you plan to make this lunch menu.

Here's how I made this simple menu.

Rajma Chawal Kadai Bhindi

Recipe Cuisine: Indian   |  Recipe Category: Lunch
Prep Time: 12 hr soaking time + 30 mins     | Cook time: 1 Hr    Serves: 3
  1. Soak 3/4 cup rajma overnight. Next day, drain the water and changed the water, pressure cook the rajma. Soak basmati rice too before you start cooking.
  2. When rajma getting cooked, cutting works. First clean and cut ladies finger and fry it side by side in low flame to eliminate the slimy thing. And proceed the cutting works on the other hand.
  3. I used some leftover tomato puree in the fridge, so made use for the rajma masala. Otherwise  you have to chop tomatoes for rajma and kadai paneer.
  4. Chop onion for rajma and kadai Bhindi, cut capsicum and keep all other ingredients like green chilli, coriander, (ginger garlic paste if not there), cashew nut paste etc.
  5. Once rajma is done, first fry and transfer for rajma masala and simmer it in a stove and let it boil. You can also give 2 whistles in a small pressure cooker too.
  6. Next finish the kadai bhindi and I  kept rice in electric rice cooker. That's it, work done. If you want you can make phulka and serve hot when serving. Make papad and keep a pickle to make it look fancy.

Rajma chawal kadai bhendi

Check out the recipes

  1. Rajma masala recipe
  2. Kadai Bhindi recipe

Check out how to make phulka.

Have a great weekend! :)

Kamis, 08 Mei 2014

Dosa recipe | South Indian dosa recipe

how-to-make-dosa
I am getting loads of requests to post dosa batter recipe. Though I never grind dosa batter separately, I had a recipe that is written in my handwritten cook book and I have tried it successfully before marriage when I was zero in cooking. So I am sure its a keeper recipe even beginners can try. I usually use my idli batter itself and just dilute it to make dosa. I have used it in all my dosa recipes like masala dosa recipe, cauliflower masala dosa, vegetable masala dosa and paneer dosa. Also I use my idli dosa batter for making utappam. Its all in all multipurpose batter. But I wanted to post this to help bachelors or beginners who want to just make it simple, quick and only dosa batter using mixie. I hope this will be useful to many Happy 
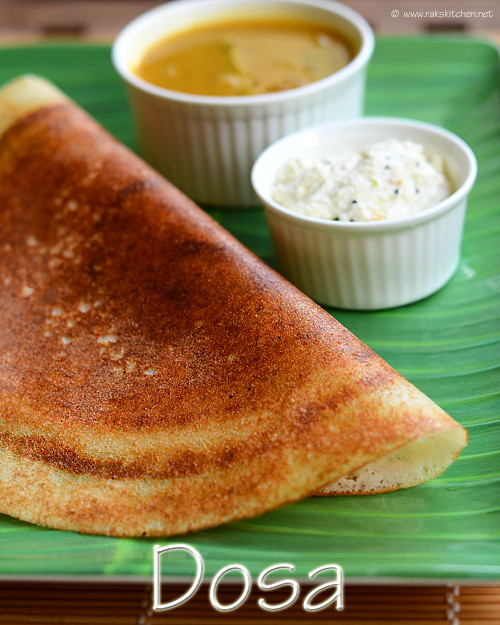
And the texture of this dosa is dense than the one I make with idli dosa batter. So perfect for masala dosas.
dosa-batter-recipe

Dosa recipe

Recipe Cuisine: Indian  |  Recipe Category: Breakfast
Prep Time: 3 hr soaking + 12 hours fermentation    |  Cook time: 2 mins per dosa    Makes: 15

Ingredients


Raw rice - 1 cup

Idli rice - 1 cup

Urad dal - 1/2 cup

Toor dal - 3 tblsp

Channa dal - 3 tblsp

Poha/ aval/ flattened rice - 1/4 cup

Salt - as needed


This video is just to get an idea, I made it with my idli dosa batter though.


Method

  1. Soak everything except salt in the ingredients together for 3 hours atleast after washing it 3 times.Grind it with little water in mixie. Need not be too smooth. Add water very carefully. You can grind in two batches and add salt in one batch and mix it lastly together. 1-dosa-batter-using-mixie
  2. Keep overnight for fermentation (12 hours). It will ferment well. Morning stir well and make dosas. Adjust consistency if its too thick by adding very little water.2-dosa-batter-recipe 
  3. Heat tawa, pour 2 ladles full of batter and  spread evenly. Then drizzle enough oil over it and cook until its golden in medium flame.  No need to flip. 

Notes

    • Right consistency and fermentation is key for even browning.
    • You can brush with butter to make it more tastier.
    • You can add methi seeds, if you want the dosa on softer side. (3/4 tsp)
    • In case it gets little more watery, add a fist full of rawa /sooji/ semolina.
    • Refer this page for more tips.

Serve hot hot with sambar, chutney or any of your favorite side dish! My kid's most favorite breakfast in this whole world! Stay tuned for another dosa version.

dosa-recipe


Rabu, 07 Mei 2014

AVARAKKAI SAMBAR RECIPE | SOUTH INDIAN RECIPES

avarakkai sambar / broad beans sambar-recipe
When I posted vendaikkai sambar recipe, as I said its my mom’s version of making sambar. And this is my MIL’s version of making sambar. I love both versions. Though its similar, the method is different. My mom and maami both cook in organized but in their own ways. MIL has specific vessels for each and everything and she wont like if we change that routines. She uses the water that we drain by washing the rice (arisi mandi) and uses it for making sambar/ rasam. She extracts tamarind juice using that water and says its healthy as well as makes it more tastier. So here is my MIL’s version of making sambar. I posted this in my last week’s lunch menu.

Avarakkai (Broad beans) sambar recipe

Recipe Cuisine: Indian  |  Recipe Category: Lunch
Prep Time: 15 mins    |  Cook time: 30 mins    Serves: 4

Ingredients


Toor dal 1/2 cup
Broad beans/ Avarakkai 10
Onion 1
Tomato 1, small
Tamarind 1 tblsp tightly packed
Sambar powder 2 & 1/2 tsp
Turmeric 1/4 tsp
Curry leaves few
Salt As needed

To temper

Oil 2 tsp
Dry red chilli 1
Mustard 3/4 tsp
Asafoetida 1/4 tsp
Jeera 1 tsp
Curry leaves A sprig

Method

  1. Soak tamarind in hot water. Pressure cook dal with water for 4 whistles. Wash broad beans and first trim the edges as shown in the picture. You can to tear it in such a way to take out the fiber in the sides. Then try tearing the broad beans into 3 to ensure removing all the thick fiber part and also check any insects inside. 1-clean
  2. Keep all the other ingredients ready too. Extract tamarind juice and make it 3 cups adding water as needed. Slice onion length wise. Chop tomatoes. I used solid asafoetida so powdered that too. 2-temper
  3. Heat a kadai and temper with the items given under ‘To temper’ table in order. Follow by onion and fry till transparent. 3-fry
  4. Add chopped tomatoes and fry till soft. Transfer to another big enough vessel and add the extracted tamarind juice. 4-fry-boil
  5. Add salt, turmeric, sambar powder and bring to boil. Add avarakkai. Bring to boil again. 5-cook
  6. Add cooked dal. Boil in medium flame. 6-boil
  7. Boil until avarakkai gets cooked and the sambar reaches desired consistency. It will slightly thicken when cools, so switch off accordingly. Garnish with torn curry leaves to make it more flavorful. 7-ready

Notes

    • Broad beans takes a while to get cooked, so add water accordingly while boiling. I guess 3 cups to 3 & 1/2 cups is enough.
    • You can use the other variety of broad beans too.
    • You can use the same amount of powder compond asafoeitda too.

Flavorful sambar, serve it with rice, we had it with small potato curry

avarakkai-sambar-recipe

Senin, 05 Mei 2014

Honeydew melon granita | Honeydew melon recipes

honeydew-melon-granita-2
Granita is easy to prepare, we can use fresh fruits, no fatty ingredients and yet delicious, perfect treats for summer! You can make this same with kirini pazham too. Honeydew melon granita is one I tried for my collection to thozhi Magazine and instantly loved it. So I decided I should blog it sure here. The sweet smell of this granita is un believable. Surprise your family and treat them this summer with this granita, I am sure you are gonna be appreciated. This is so simple and easy to make, amazing taste and fun making it too. So try it out and send me your feedback!
honeydew-melon-granita-1

Honeydew melon recipe

Recipe Cuisine: Indian  |  Recipe Category: Snack
Prep Time: 6 Hr    |  Cook time: 0 mins    Serves: 2

Ingredients

Honeydew melon, chopped roughly - 2 cups

Sugar - 1/4 cup

Lemon juice - 2 tsp

Lemon zest - 2 pinches


Method

  1. Scoop the pulp of the melon with a laddle or just cut and slice off the skin, chop the fruit roughly and grind it with lemon juice.
  2. 1-clean-and-chop
  3. Grind smoothly and pour it in a freezer safe, flat and broad box. Mix in the lemon zest. Freeze for an hour and again take it out, wipe the sides inside the box especially corners, that would have started to freeze.
  4. 2-grind-smoothly
  5. Again freeze overnight or minimum 6 hours and use a fork to scrap the frozen mixture and serve immediately.
  6. 3-freeze-and-scrap

Notes

    • You can skip both lemon and lemon zest and make it same way. It tastes great too.
    • While freezing, refrain opening the freezer door often.
    • Granita is supposed to be grainy, so make sure you scrap with fork and there should not be any lumps too. 

For serving, you can freeze the serving bowl too to avoid melting soon. Delicious!

honeydew-melon-granita

Sabtu, 03 Mei 2014

Lunch menu 36 - Vazhaipoo vadai, Sambar, small potato curry

Vazhaipoo vadai, sambar curry

For a while, I was ignoring the vazhaipoo (banana blossom) in Mustafa. I think what we get in Mustafa is from Malaysia and I found the in Laavan is from India and its so very different from the Malaysian vazhaipoo. Most of the time I buy and cook it within one or two days, otherwise it will be turning black. I make poriyal to make use of the big flower in one time. This time somehow craving for vazhaipoo vadai and its been a long time since I made vadai, so decided to make vadai and post it in lunch menu too. Since vazhaipoo cleaning and cutting process involves time, I made a simple menu, but a catch one, since it has vadai and these cute baby potato fry in it Big Grin.

Lunch menu 36 - Vazhaipoo vadai, Sambar, curry

Recipe Cuisine: Indian   |  Recipe Category: Lunch
Prep Time: 2 Hr     |  Cook time: 1 Hr    |  Serves: 3
  1. Soak dal for vadai as soon as you finish your breakfast work.
  2. Pressure cook dal, baby potatoes in a pressure cooker if you have two separator containers. You can keep rice once this is done. Soak tamarind for sambar.
  3. Mean while you can start the cleaning and chopping of vazhaipoo. Since we are gonna use the outer part and only half of it, its wont take too much time. Keep it immersed in water with lemon juice or buttermilk until use.
  4. Clean and prepare broad beans for sambar, keep aside.
  5. Chop onion for sambar, vadai, a tomato for sambar and extract tamarind for sambar. Peel the potatoes and keep ready. Keep all other ingredients like curry leaves too ready.
  6. First prepare sambar and while it boils,  prepare small potato curry. Sambar will take a while until curry gets ready as broad beans takes some time to get cooked.
  7. Lastly, you can prepare vadai and keep ready before serving the lunch.

Serve avarakkai sambar, baby potato curry, vazhaipoo vadai along with rice and end your meal with buttermilk to keep yourself cool in this summer.
lunch menu rakskitchen

Check out the links.
  1. Avaraikai / broad beans sambar (Coming up next)
  2. Small potato curry recipe
  3. Vazhaipoo / banana flower vadai recipe
You can make the regular potato curry too. Check out the other sambar recipes too.  keerai sambar recipemango sambar recipe,arachuvitta samabr recipe.

Happy Weekend! Happy
 

Blogger news

Blogroll

About